Meta description: A vanilla honey Virgo cake with gold constellation details and fresh herb accents. Elegant, easy to customize, and perfect for any earth sign birthday.
Would you believe me if I said your zodiac sign can be a cake now?
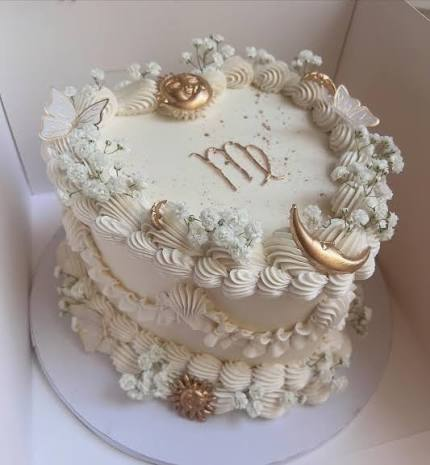
I stumbled across this trend a few weeks ago and could not stop staring at it. A soft vanilla cake, dressed up in gold stars, with a tiny constellation traced right onto the frosting.
It’s the kind of dessert that looks like it came from a bakery that only exists in your dreams. And the wild part? It’s actually pretty doable in a regular kitchen.
This Virgo cake leans into everything the sign is known for. Earthy. Detail oriented. A little bit perfectionist. So the cake itself is simple and grounded (vanilla and honey, nothing wild), but the decorating is where all that Virgo precision gets to shine.
Side Note: You don’t have to be a Virgo to make this. I made mine for a friend’s birthday and half the guests asked if they could “borrow” the recipe for their own sign.
Why This Cake Works
Three things make this cake worth the extra effort.
- The vanilla bean and honey combo tastes warm and a little floral, not one-note sweet.
- The gold leaf details look expensive but cost about $6 for a whole pack.
- The constellation piping is honestly more forgiving than it looks in photos.
You don’t need a fine arts degree. You need a steady hand, a toothpick, and about 20 quiet minutes.
What You’ll Need
For the vanilla honey cake
- 2 ½ cups (313g) cake flour
- 2 ½ tsp baking powder
- ½ tsp salt
- 1 cup (227g) unsalted butter, softened
- 1 ¾ cups (350g) granulated sugar
- 4 large eggs, room temperature
- 1 tbsp vanilla bean paste (or vanilla extract)
- 1 cup (240ml) whole milk, room temperature
- ⅓ cup (80g) sour cream
For the honey vanilla buttercream
- 1 ½ cups (340g) unsalted butter, softened
- 4 to 5 cups (500 to 625g) powdered sugar
- 3 tbsp honey
- 1 tbsp vanilla bean paste
- 2 to 3 tbsp heavy cream
- Pinch of salt
For decorating
- 1 sheet edible gold leaf
- Edible gold luster dust or gold sprinkles
- Fresh rosemary and thyme sprigs
- Small edible flowers (optional, for the top border)
Tools You’ll Need
- Three 6-inch cake pans
- Stand mixer or hand mixer
- Cake turntable
- Offset spatula
- Bench scraper
- Piping bag with a small star tip
- Small, clean paintbrush (for the gold leaf)
- Cooling racks
- Toothpick (yes, really, for the constellation)
Pro Tips
These are the details that separate a good Virgo cake from a great one.
- Room temperature everything. Cold butter or eggs will make your batter curdle and your cake dense. Set them out a full hour ahead.
- Sketch your constellation first. Use a toothpick to lightly poke the star pattern into the frosting before you pipe anything gold. Way less pressure than freehanding it.
- Chill between coats. A crumb coat that isn’t fully chilled will drag color into your final layer. 20 minutes in the fridge fixes that instantly.
- Gold leaf loves dry hands. It sticks to everything except what you actually want it to stick to. Use the paintbrush, not your fingers.
- Don’t skip the honey. It sounds like a small swap from regular sugar syrup, but it’s what gives this cake its slightly warm, almost floral flavor.
How to Make Virgo Cake
Bake the layers
- Preheat your oven to 350°F (175°C). Grease and line three 6-inch cake pans.
- Whisk the cake flour, baking powder, and salt together in a bowl. Set aside.
- Beat the butter and sugar together until pale and fluffy, about 3 minutes.
- Add the eggs one at a time, beating well after each one. Mix in the vanilla bean paste.
- Alternate adding the dry ingredients and the milk, starting and ending with the dry mix. Fold in the sour cream last.
- Divide the batter evenly between the pans. Bake for 28 to 32 minutes, until a toothpick comes out clean.
- Cool the layers in their pans for 10 minutes, then move them to a wire rack to cool completely.
Make the buttercream
- Beat the softened butter on its own for about 2 minutes, until smooth.
- Add the powdered sugar one cup at a time, mixing on low so it doesn’t fly everywhere.
- Add the honey, vanilla bean paste, and a pinch of salt. Beat until combined.
- Add heavy cream one tablespoon at a time until the frosting is smooth and pipeable.
Assemble and decorate
- Level your cooled cake layers with a serrated knife if they domed at all.
- Place the first layer on your turntable and spread an even layer of buttercream on top.
- Repeat with the second layer, then top with the third.
- Apply a thin crumb coat around the whole cake. Chill for 20 minutes.
- Apply your final, thicker coat of frosting. Smooth the sides with a bench scraper.
- Pipe small rosettes or stars along the top edge using your star tip.
- Use a toothpick to lightly mark out a constellation pattern on the side of the cake.
- Dip your paintbrush in a little water, then use it to gently pick up small pieces of gold leaf and press them onto the marked points.
- Connect the points with thin lines of gold luster dust mixed with a drop of vodka or lemon extract for a paintable consistency.
- Tuck in a few sprigs of rosemary or thyme around the base and top for that fresh, earthy finish.
Substitutions and Variations
This recipe is flexible enough to bend toward whatever you have on hand.
| Original | Swap | Notes |
|---|---|---|
| Cake flour | All-purpose flour + 2 tbsp cornstarch per cup | Slightly denser texture, still works well |
| Whole milk | Oat milk or almond milk | Use full-fat versions for best texture |
| Sour cream | Plain Greek yogurt | Same tang, slightly firmer crumb |
| Honey | Maple syrup | Gives a slightly different, still warm flavor |
| Gold leaf | Gold sprinkles or gold dragées | Easier for beginners, still photographs well |
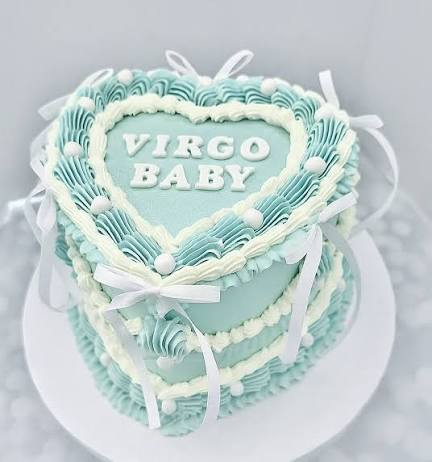
Want to make this for a different sign? Swap the gold constellation for whatever pattern matches, and adjust the color palette. Deep blue for Scorpio, soft pink for Libra, that kind of thing.
Make Ahead Tips
You can absolutely spread this project out over a few days.
- Cake layers can be baked up to 2 days ahead. Wrap tightly in plastic and store at room temperature, or freeze for up to 2 months.
- Buttercream keeps in the fridge for 5 days. Let it come to room temperature and rewhip before using.
- Assembled cake holds well in the fridge for up to 2 days before serving, though I’d add the gold leaf and herbs the day of for the freshest look.
Nutrition (Per Slice, Based on 12 Slices)
This is an estimate based on standard ingredient brands. Actual values will vary depending on what you use.
| Nutrient | Amount |
|---|---|
| Calories | ~480 |
| Total Fat | 24g |
| Carbohydrates | 62g |
| Sugar | 47g |
| Protein | 4g |
Meal Pairing Ideas
A slice of this pairs beautifully with something that cuts through all that sweetness.
- Unsweetened black tea or Earl Grey
- A shot of espresso
- Fresh berries on the side to balance the richness
Time Efficiency Tip
If your oven only fits two pans comfortably, bake two layers first and the third right after. Just make sure your batter doesn’t sit out too long, or your rise won’t be even across all three layers.
Leftovers and Storage
- Room temperature: Covered, this cake is fine for up to 2 days.
- Refrigerator: Store in an airtight container for up to 5 days. Let slices sit out for 20 minutes before eating so the buttercream softens back up.
- Freezer: Wrap individual slices tightly in plastic, then foil, and freeze for up to 3 months. Thaw overnight in the fridge.
FAQ
Is edible gold leaf actually safe to eat?
Yes, as long as it’s labeled 22 to 24 karat edible gold leaf, made specifically for food use. Craft store gold leaf is not the same thing and shouldn’t go anywhere near your cake.
Can I make this cake gluten free?
Yes. Swap in a 1:1 gluten free baking flour blend. The texture will be slightly more delicate, so handle the layers gently.
Do I need a turntable to decorate this?
It helps a lot for smooth sides, but you can rotate a plate by hand if you’re patient.
Can I skip the constellation and just do stars?
Of course. Random gold stars scattered across the frosting still look striking without the extra step.
Why three 6-inch pans instead of two 8-inch pans?
The taller, narrower shape is what gives this cake its elegant, almost boutique-bakery look. Two 8-inch pans will work too, just adjust your bake time down slightly.
Wrapping Up
This cake takes a little patience, but nothing about it is actually hard.
Bake the layers, make the frosting, and let the gold leaf do the heavy lifting on presentation.
If you end up making your own zodiac cake, I want to see it. Drop a comment below and let me know which sign you made, or ask away if anything about the gold leaf or piping trips you up. I read every single one.