I used to think cornbread was one of those “why bother” recipes.
The box mix version is fine. It gets the job done. But the first time I made cornbread completely from scratch, I actually laughed out loud in my kitchen.
It was that much better.
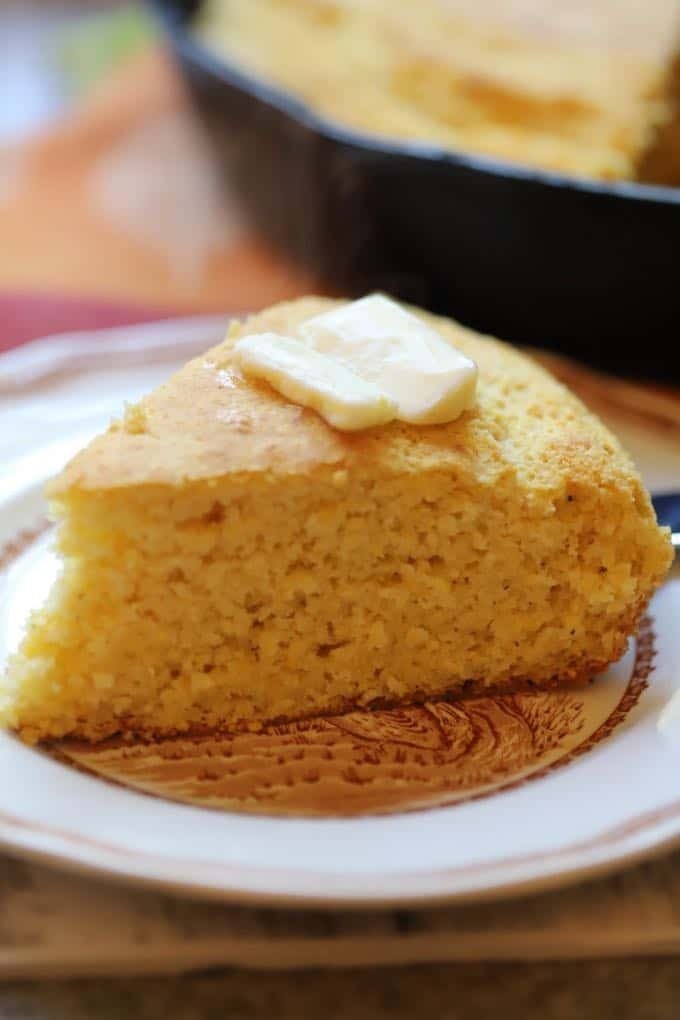
This version is buttery, slightly sweet, and has crispy edges that somehow stay soft in the middle. It takes about 10 minutes of actual hands-on work, and the rest is just waiting while your kitchen smells incredible.
Side Note: If you’re a fan of comfort food sides, you’ll probably also love this Korean ground beef bowl or a good tater tot casserole for the same cozy, no-fuss energy.
Let’s get into it.
Why This Recipe Works
Most boxed cornbread mixes lean on shortcuts. Powdered milk, stabilizers, and just enough sugar to mask the fact that it’s mostly filler.
Homemade cornbread skips all of that.
You’re working with real buttermilk, real butter, and real honey. Every ingredient is pulling its weight, which is exactly why the flavor tastes so much richer for barely any extra effort.
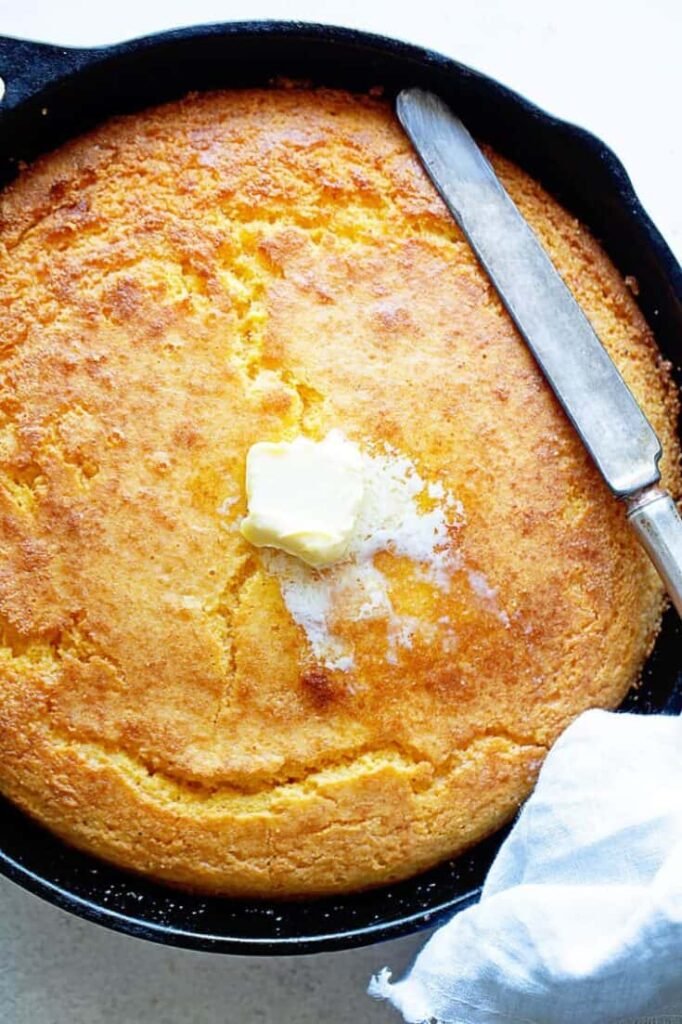
The other big difference is texture. A hot cast iron skillet gives you a crust that’s almost fried on the outside, while the inside stays tender and a little custardy. Box mixes just can’t replicate that contrast, no matter what the packaging promises.
What You’ll Need
Nothing fancy here. Most of this is already sitting in your pantry.
| Ingredient | Amount |
|---|---|
| Yellow cornmeal | 1 cup |
| All-purpose flour | 1 cup |
| Granulated sugar | ⅓ cup |
| Baking powder | 1 tablespoon |
| Baking soda | ¼ teaspoon |
| Salt | ¾ teaspoon |
| Buttermilk | 1 cup |
| Eggs | 2 large |
| Unsalted butter, melted | ½ cup (1 stick) |
| Honey | 2 tablespoons |
That’s it. Ten ingredients and most of them are already sitting in your pantry.
Tools You’ll Need
- 9-inch cast iron skillet (or an 8×8-inch baking pan)
- Mixing bowls (one large, one medium)
- Whisk
- Rubber spatula
- Measuring cups and spoons
A cast iron skillet gives you those crispy, almost fried-tasting edges. If you don’t have one, a regular baking pan still works. It just won’t get quite as crispy around the sides.
Pro Tips
These are the little things that took me a few tries to figure out.
- Melt your butter first and let it cool slightly. If it’s too hot when you mix it into the eggs, you’ll end up with scrambled bits of egg in your batter. Not cute.
- Don’t overmix. Stir until the dry ingredients just disappear into the wet ones. Overmixing activates the gluten in the flour, and suddenly your fluffy cornbread turns dense and rubbery.
- Preheat the skillet in the oven before adding batter. This is the secret to that crispy bottom crust everyone fights over. Pour the batter into a hot, buttered skillet and you’ll hear it sizzle. That sound means you’re doing it right.
- Use buttermilk, not regular milk. The acidity reacts with the baking soda and gives you a lighter texture. No buttermilk on hand? Scroll down, I’ve got you covered in the substitutions section.
- Let it rest for 5 minutes before slicing. I know it’s tempting to cut in immediately. But letting it sit helps the crumb set so your slices hold together instead of falling apart.
How to Make Homemade Cornbread
- Preheat your oven to 425°F. Place your cast iron skillet inside while it heats up. You want that skillet screaming hot.
- Whisk the dry ingredients. In a large bowl, combine the cornmeal, flour, sugar, baking powder, baking soda, and salt.
- Mix the wet ingredients. In a separate bowl, whisk together the buttermilk, eggs, melted butter, and honey until smooth.
- Combine. Pour the wet mixture into the dry ingredients. Stir gently with a spatula until just combined. A few small lumps are totally fine.
- Prep the skillet. Carefully remove the hot skillet from the oven (it’s hot, use a mitt). Add a tablespoon of butter and swirl it around to coat the bottom and sides.
- Pour and bake. Pour the batter into the skillet. It should sizzle right away. Bake for 20 to 25 minutes, or until the top is golden and a toothpick comes out clean.
- Cool slightly, then serve. Let it rest for 5 minutes in the skillet before slicing. Serve warm with extra butter and honey on top.
Substitutions and Variations
Cornbread is forgiving, so feel free to play around.
- No buttermilk? Mix 1 cup regular milk with 1 tablespoon of lemon juice or white vinegar. Let it sit for 5 minutes before using.
- Want it sweeter? Bump the sugar up to ½ cup for a dessert-like cornbread.
- Want it savory? Cut the sugar down to 2 tablespoons and fold in ½ cup of shredded sharp cheddar and a chopped jalapeño.
- Dairy-free? Swap the buttermilk for a plant-based milk mixed with a tablespoon of lemon juice, and use melted vegan butter or coconut oil instead of regular butter.
- Gluten-free? Use a 1:1 gluten-free flour blend in place of the all-purpose flour. The texture will be slightly more delicate but still tasty.
- Add-ins: Corn kernels, crumbled bacon, diced green chiles, or chopped chives all work well folded into the batter.
Make-Ahead Tips
You can mix the dry ingredients up to 3 days ahead and store them in an airtight container at room temperature. When you’re ready to bake, just whisk together the wet ingredients and combine.
I don’t recommend mixing the full batter ahead of time. The baking powder and baking soda start working the moment they hit liquid, so you’ll lose some of that rise if it sits too long before baking.
A Few Extra Details
Nutrition (per slice, based on 9 slices):
| Nutrient | Amount |
|---|---|
| Calories | ~230 |
| Fat | 10g |
| Carbohydrates | 30g |
| Sugar | 9g |
| Protein | 5g |
These numbers are estimates and will shift depending on your exact ingredients, so double check before relying on them for anything strict.
Pairing ideas: This cornbread is made for chili, pulled pork, black-eyed peas, or a big pot of soup. It also holds its own as a snack with just a smear of honey butter.
Time-saving tip: Measure out all your dry ingredients the night before if you’re making this for a weeknight dinner. It cuts your active time down to about 5 minutes.
Leftovers and Storage
Counter: Store leftover cornbread in an airtight container at room temperature for up to 2 days.
Fridge: It’ll keep for about a week in the fridge, though the texture gets a little denser.
Freezer: Wrap individual slices in plastic wrap, then place in a freezer bag. It freezes well for up to 3 months.
Reheating: Warm slices in a 300°F oven for about 10 minutes, or microwave for 20 to 30 seconds if you’re in a hurry. A quick pass in a buttered skillet also brings back some of that crispy edge.
FAQ
Why did my cornbread turn out crumbly?
This usually means it was overbaked or there wasn’t enough fat and moisture in the batter. Stick close to the measurements above and pull it out as soon as a toothpick comes out clean.
Can I make this without a cast iron skillet?
Yes. An 8×8-inch baking pan works fine. You just won’t get the same crispy edges, and your bake time might run a few minutes longer.
Is cornbread supposed to be sweet?
It depends who you ask. Northern-style cornbread tends to be sweeter, while Southern-style is more savory and less sugary. This recipe sits somewhere in the middle, and you can adjust the sugar either direction.
Can I double this recipe?
Yes, this recipe doubles well. Use a 9×13-inch pan and add roughly 10 extra minutes to the bake time.
Why is my cornbread dense instead of fluffy?
Overmixing is the most common culprit. Stir just until the batter comes together and stop there, even if it looks a little lumpy.
Why does my cornbread stick to the pan?
This usually happens when the skillet isn’t buttered generously enough, or the batter went in before the pan was fully heated. Coat the entire bottom and up the sides with butter, and make sure you hear that sizzle when the batter hits the pan.
Can I use frozen or canned corn kernels as a mix-in?
Yes. Drain canned corn well or thaw and pat frozen kernels dry before folding them in. Extra moisture from wet corn can throw off the texture, so blotting it first makes a real difference.
What’s the difference between cornmeal and corn flour?
Cornmeal is coarser and gives cornbread its signature slightly gritty texture. Corn flour is finer and more like actual flour. Stick with cornmeal for this recipe, since it’s what gives cornbread its texture in the first place.
Wrapping Up
Once you make cornbread from scratch, it’s genuinely hard to go back to the box.
It takes barely more effort, and the payoff (crispy edges, soft center, that faint sweetness) is worth it every time.
Give this one a try this week, then come back and tell me how it turned out in the comments. I’d love to know if you went sweet, savory, or somewhere in between.