I used to think cherry tomatoes were just a salad filler. The little red balls you toss in because a recipe told you to, not because you were excited about them.
Then I roasted a pan of them with garlic and herbs one random Tuesday, and everything changed.
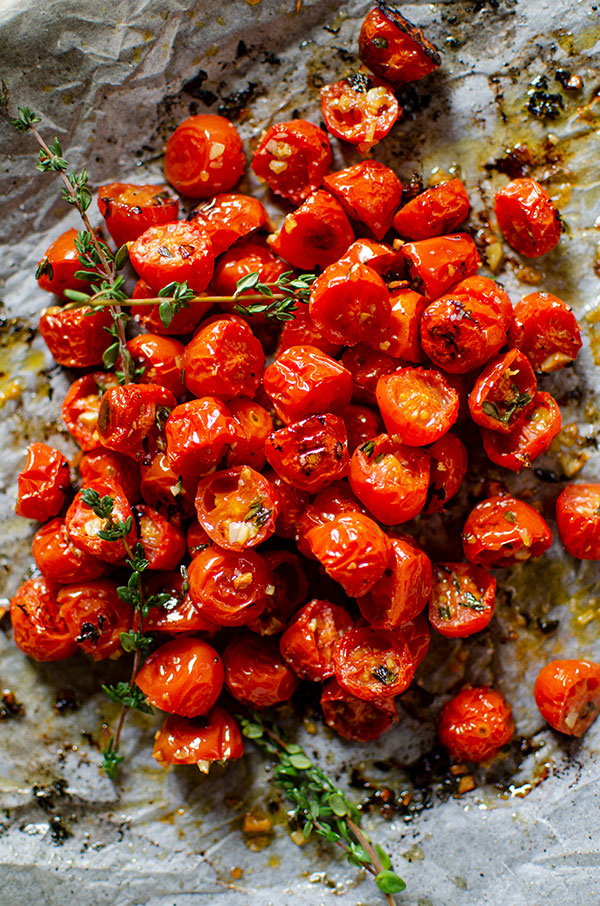
They come out of the oven wrinkled, jammy, and almost caramelized. Some of them burst open. The garlic goes soft and sweet. And the smell that fills your kitchen is honestly better than most candles I’ve bought.
This is one of those recipes that feels fancy but takes about 5 minutes of actual effort. You’re mostly just waiting on the oven to work its magic.
Side Note: If you end up with extra cherry tomatoes and want another way to use them, my caprese skewers are a great next stop.
Why This Recipe Works
Roasting does something to tomatoes that no other cooking method really matches.
The high heat pulls out the water, which concentrates all that natural sweetness. At the same time, the edges start to caramelize, which adds a little char and depth.
Add garlic and herbs into the mix, and you get this savory, slightly sweet, herby thing that works with almost everything. Pasta, toast, eggs, grain bowls. You name it.
It’s also one of the lowest-effort ways to use up a big carton of cherry tomatoes before they go soft on the counter. No peeling, no seeding, no fussing. Just toss and roast.
And unlike a lot of “fancy looking” side dishes, this one is nearly impossible to mess up. There’s no delicate timing, no whisking a sauce that could break. You’re just letting the oven do the heavy lifting while the tomatoes transform on their own.
What You’ll Need
| Ingredient | Amount | Notes |
|---|---|---|
| Cherry tomatoes | 2 pints (about 4 cups) | Any color works, but mixed colors look prettier |
| Garlic cloves | 4-6, smashed | Smashing releases more flavor than mincing |
| Olive oil | 3 tablespoons | Use a good one, you’ll taste it |
| Fresh thyme | 4-5 sprigs | Rosemary works too |
| Fresh basil | Handful, torn | Added after roasting, not before |
| Salt | 1/2 teaspoon | Kosher salt preferred |
| Black pepper | 1/4 teaspoon | Freshly cracked if you have it |
| Balsamic vinegar | 1 tablespoon (optional) | Adds a little tang at the end |
| Red pepper flakes | Pinch (optional) | For people who like a little heat |
Tools You’ll Need
- A sheet pan or oven-safe skillet
- A mixing bowl
- A sharp knife for smashing the garlic
- Parchment paper (makes cleanup way easier)
- Tongs or a spatula for stirring halfway through
How to Make Roasted Cherry Tomatoes With Garlic and Herbs
- Preheat your oven to 400°F. Line a sheet pan with parchment paper.
- Add the tomatoes to a mixing bowl. Toss in the smashed garlic, olive oil, thyme sprigs, salt, and pepper.
- Toss everything together until every tomato has a light coating of oil.
- Spread the tomatoes out on the sheet pan in a single layer. Don’t crowd them, or they’ll steam instead of roast.
- Roast for 20-25 minutes. You’re looking for the skins to blister and some tomatoes to burst open on their own.
- Give the pan a shake or stir halfway through so everything roasts evenly.
- Pull the pan out once the tomatoes look wrinkled and slightly caramelized at the edges.
- Remove the thyme sprigs (the leaves will have fallen off into the tomatoes, which is exactly what you want).
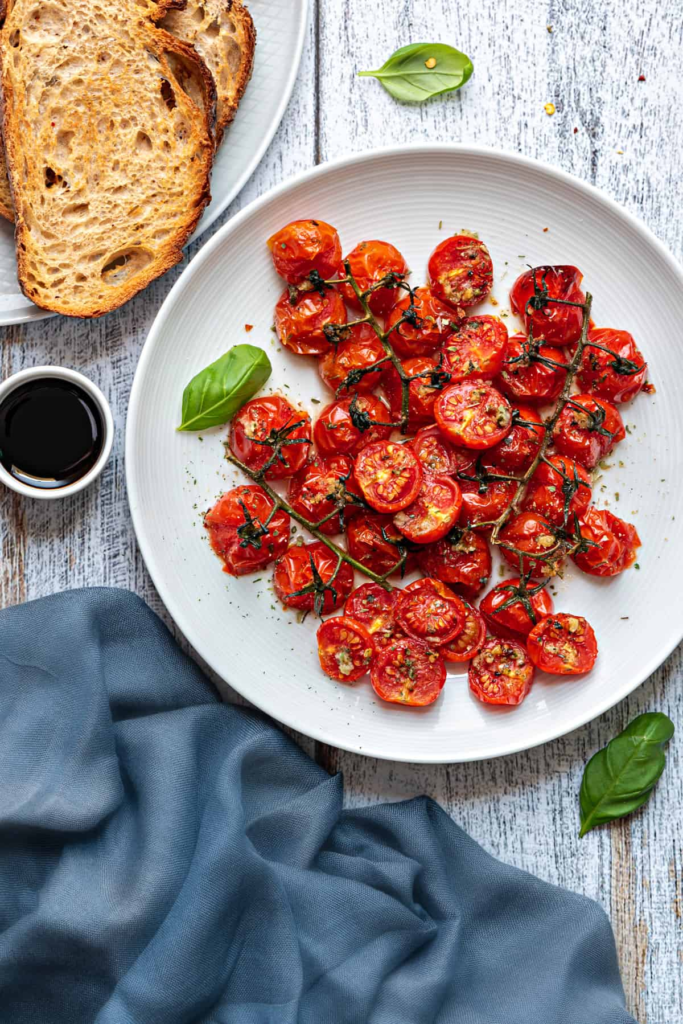
- Drizzle with balsamic vinegar if using, and scatter the torn basil on top.
- Taste and adjust the salt. Serve warm.
Pro Tips
- Don’t skip the single layer. Overcrowding the pan is the number one reason people end up with mushy, steamed tomatoes instead of blistered, roasted ones.
- Smash the garlic, don’t mince it. Minced garlic burns fast at 400°F. Smashed cloves roast low and slow and turn sweet instead of bitter.
- Add soft herbs at the end. Basil turns black and bitter if it roasts the whole time. Save it for after.
- Use a rimmed sheet pan. The tomatoes release juice as they cook, and a flat pan means that juice ends up on your oven floor.
- Let them cool for 2-3 minutes before serving over anything cold, like burrata or a salad, so they don’t wilt everything instantly.
Substitutions and Variations
- No fresh thyme? Use 1/2 teaspoon dried thyme instead, or swap for rosemary or oregano.
- Want it spicier? Add red pepper flakes before roasting, or a drizzle of chili oil after.
- Out of balsamic? A squeeze of lemon juice at the end brightens things up just as well.
- Vegan and dairy-free already, so no swaps needed there.
- Add a protein like shrimp or chicken to the same pan during the last 10 minutes of roasting for a full dinner.
- Swap the oil for avocado oil if you want a higher smoke point, though 400°F is well within olive oil’s range.
Make Ahead Tips
You can roast these up to 3 days ahead and store them in the fridge. Pull them out about 20 minutes before serving so they’re not ice cold.
If you’re prepping for a party, this is a great make-ahead appetizer base. Just add the fresh basil right before serving instead of storing it in with the tomatoes.
Ways to Use Them
This is where the recipe really earns its keep. A few of my favorite ways to use a batch:
- Spooned over burrata or fresh mozzarella with crusty bread
- Tossed with pasta, a splash of the roasting oil, and parmesan
- Piled onto avocado toast
- Stirred into scrambled eggs or an omelet
- Served alongside grilled chicken or fish
- Mixed into a grain bowl with quinoa or farro
Time-Saving Tip
If you’re making these on a weeknight, prep the garlic and herbs while the oven preheats, so there’s zero dead time.
You can also double the batch and roast it on two pans at once (just rotate them halfway through). That way you get enough for dinner tonight and leftovers for lunch tomorrow, without adding any extra active time.
Nutrition (Per Serving, Estimated)
| Nutrient | Amount |
|---|---|
| Calories | ~90 |
| Fat | 7g |
| Carbohydrates | 7g |
| Fiber | 2g |
| Protein | 1g |
| Sodium | 150mg |
Side Note: These numbers are estimates based on a serving size of about 1 cup. If you’re tracking nutrition closely, plug your exact ingredient brands into a calculator before relying on these.
Leftovers and Storage
Store leftovers in an airtight container in the fridge for up to 4 days.
Reheat gently in a skillet over low heat, or just eat them cold, they’re honestly still good that way. I don’t recommend microwaving them for too long, since they can turn mushy fast.
You can also freeze roasted cherry tomatoes for up to 3 months. Freeze them in a single layer on a tray first, then transfer to a freezer bag once solid. This keeps them from turning into one giant tomato block.
FAQ
Can I use regular tomatoes instead of cherry tomatoes?
You can, but you’ll need to cut them into similar-sized chunks and adjust the roasting time. Cherry tomatoes work especially well because their skins blister quickly and the whole tomato cooks evenly.
Why did my tomatoes turn out watery instead of caramelized?
This usually means the pan was too crowded, or the oven wasn’t fully preheated. Give the tomatoes room to breathe on the pan, and make sure your oven has reached 400°F before they go in.
Can I roast these at a lower temperature?
You can roast at 350°F for a slower, more gentle roast, but expect to add another 10-15 minutes to the cook time. 400°F gives you that blistered texture faster.
Do I need to peel the garlic before smashing it?
Yes, peel it first, then smash it with the flat side of a knife. This breaks it open just enough to release flavor without it disappearing into the tomatoes.
Can I make this on the stovetop instead?
Yes. Use a skillet over medium heat, cover, and cook for 10-15 minutes, shaking occasionally, until the tomatoes blister and burst. You won’t get quite the same caramelization as the oven, but it works in a pinch.
Can I use grape tomatoes instead of cherry tomatoes?
Yes, grape tomatoes roast just as well. They’re slightly firmer and less juicy, so they’ll hold their shape a bit more, but the flavor payoff is nearly identical.
Why did the garlic taste bitter after roasting?
Bitter garlic almost always means it got too close to direct heat or roasted too long at too high a temperature. Smashing the cloves (instead of mincing) and nestling them among the tomatoes, rather than directly on the hot pan, helps protect them.
Wrapping Up
If you’ve never roasted cherry tomatoes before, this is your sign to finally try it.
It’s low effort, hard to mess up, and turns something as basic as a tomato into one of those dishes people ask you about at dinner.
Make a batch this week and let me know how it goes in the comments. I’d love to hear what you served them with, or if you tried any of the variations above.