Can a muffin actually make someone gasp out loud?
Mine did. My neighbor took one bite, stopped mid-sentence, and just stared at it like it betrayed her in the best way possible.
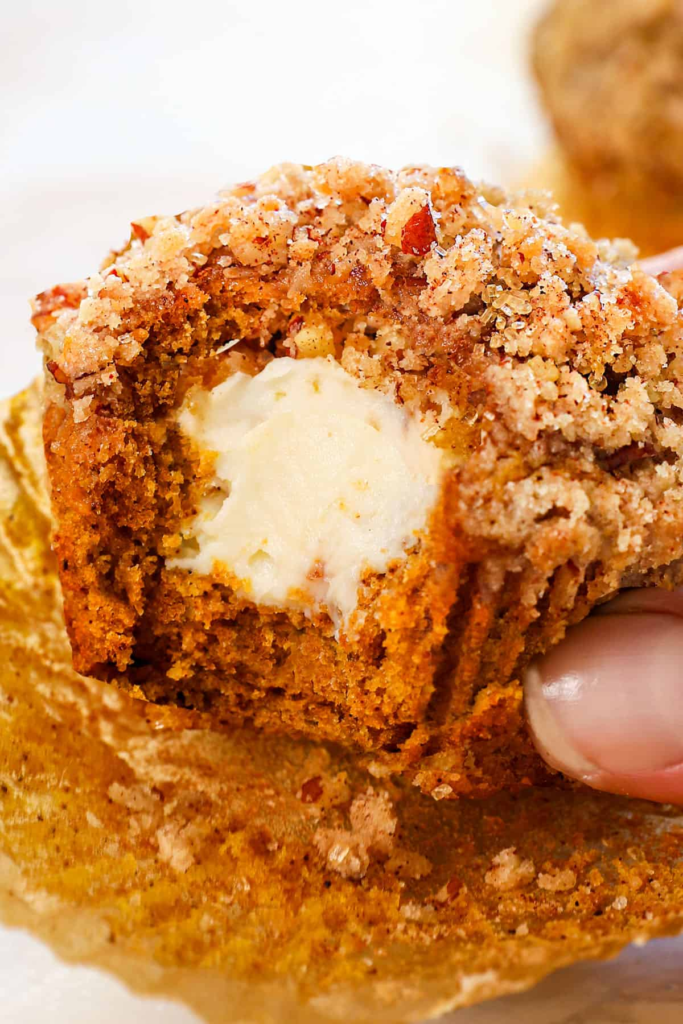
That’s what happens when you hide a cheesecake center inside a soft pumpkin muffin. Nobody sees it coming.
I started making these a few falls ago when I had leftover pumpkin puree and cream cheese that needed a job. What came out of the oven was somewhere between a muffin, a cupcake, and a mini cheesecake. It’s basically fall in a paper liner.
Side Note: If you love pumpkin desserts as much as I do, these muffins disappear faster than anything else I bake in October.
Why This Recipe Works
The pumpkin base stays moist for days because of the oil and pumpkin puree combo. No dry, crumbly muffin here.
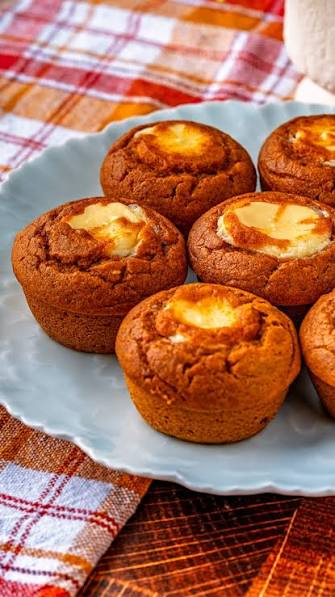
The cheesecake filling gets swirled right into the batter, so every single bite has a little pocket of creamy tang against the warm spice.
And the cinnamon sugar topping? It gives you that little crunch that makes people ask “wait, what’s in these.”
They also come together in one bowl for the muffin batter and one small bowl for the filling. No fancy equipment, no waiting for butter to soften for hours, no complicated layering process. Just mix, swirl, and bake.
What You’ll Need
For the pumpkin muffins:
| Ingredient | Amount |
|---|---|
| All-purpose flour | 2 cups |
| Baking soda | 1 tsp |
| Baking powder | 1/2 tsp |
| Salt | 1/2 tsp |
| Ground cinnamon | 1 1/2 tsp |
| Ground nutmeg | 1/4 tsp |
| Ground ginger | 1/4 tsp |
| Pumpkin puree (not pie filling) | 1 1/2 cups |
| Granulated sugar | 3/4 cup |
| Brown sugar, packed | 1/2 cup |
| Vegetable oil | 1/2 cup |
| Eggs | 2 large |
| Vanilla extract | 1 tsp |
For the cheesecake filling:
| Ingredient | Amount |
|---|---|
| Cream cheese, softened | 8 oz |
| Granulated sugar | 1/4 cup |
| Egg yolk | 1 |
| Vanilla extract | 1/2 tsp |
For the topping:
| Ingredient | Amount |
|---|---|
| Granulated sugar | 2 tbsp |
| Ground cinnamon | 1/2 tsp |
Tools You’ll Need
- Muffin tin (standard 12-cup)
- Paper liners
- Two mixing bowls
- Hand mixer or stand mixer
- Rubber spatula
- Cookie scoop or two spoons
- Toothpick for testing doneness
Pro Tips
- Room temperature cream cheese is non-negotiable. Cold cream cheese leaves lumps in your filling, and nobody wants a lumpy cheesecake center.
- Don’t overmix the muffin batter. Stir just until the flour disappears. Overmixing gives you dense, tough muffins instead of soft, fluffy ones.
- Fill the liners more than you think you should. These muffins don’t dome much because of the cheesecake center, so filling them about 3/4 full gives you a fuller, bakery-style muffin.
- Swirl gently. You want ribbons of cheesecake through the batter, not a fully mixed muffin. A butter knife dragged through once or twice in a figure-eight motion is plenty.
- Let them cool before diving in. I know, I know. But the cheesecake center needs a few minutes to set, or it’ll be more of a warm pudding than a filling.
How to Make Pumpkin Cheesecake Muffins
Step 1: Prep your pan and oven
Preheat your oven to 350°F. Line a muffin tin with paper liners.
Step 2: Make the cheesecake filling
In a small bowl, beat the cream cheese, sugar, egg yolk, and vanilla until smooth. Set this aside.
Step 3: Mix the dry ingredients
In a medium bowl, whisk together the flour, baking soda, baking powder, salt, cinnamon, nutmeg, and ginger.
Step 4: Mix the wet ingredients
In a large bowl, whisk the pumpkin puree, granulated sugar, brown sugar, oil, eggs, and vanilla until smooth.
Step 5: Combine
Add the dry ingredients to the wet ingredients. Fold together with a spatula just until combined. A few streaks of flour left in the batter is fine.
Step 6: Layer the muffins
Fill each muffin liner about halfway with pumpkin batter. Add a heaping tablespoon of cheesecake filling on top. Cover with another spoonful of pumpkin batter until the liner is about 3/4 full.
Step 7: Swirl
Drag a toothpick or the tip of a knife through each muffin once or twice to create a marbled effect.
Step 8: Add the topping
Mix the cinnamon and sugar for the topping and sprinkle a pinch over each muffin.
Step 9: Bake
Bake for 20 to 23 minutes, or until a toothpick inserted into the pumpkin part (not the cheesecake center) comes out clean.
Step 10: Cool
Let the muffins cool in the pan for 10 minutes, then transfer to a wire rack. Let them cool at least 20 more minutes before eating so the filling sets properly.
Substitutions and Variations
- No pumpkin pie spice on hand? Just use 2 teaspoons of pumpkin pie spice instead of the individual cinnamon, nutmeg, and ginger.
- Dairy-free version: Swap the cream cheese for a plant-based cream cheese and use a neutral oil (already in the recipe, so you’re halfway there).
- Gluten-free version: A 1:1 gluten-free flour blend works well here. The texture stays close to the original.
- Add mix-ins: Chopped pecans or mini chocolate chips folded into the pumpkin batter take these to another level.
- Streusel topping: Swap the cinnamon sugar for a quick streusel of flour, brown sugar, and cold butter if you want extra texture on top.
Make-Ahead Tips
You can make the cheesecake filling up to 2 days ahead and keep it covered in the fridge.
The muffins themselves are best baked fresh, but you can mix the dry ingredients the night before and store them in an airtight container on the counter.
Want muffins ready for a busy morning? Bake them the night before. They taste just as good, if not better, the next day once the flavors settle.
Nutrition Estimate (Per Muffin)
| Nutrient | Amount |
|---|---|
| Calories | ~220 |
| Fat | 11g |
| Carbohydrates | 27g |
| Protein | 4g |
| Sugar | 16g |
These are estimates based on standard ingredient brands. If you’re watching sugar intake, cutting the granulated sugar in the muffin batter down to 1/2 cup still gives you a great result.
Leftovers and Storage
Countertop: These are fine at room temperature for a day, but because of the cream cheese filling, I’d only leave them out if you’re eating them same-day.
Fridge: Store in an airtight container for up to 5 days. This is honestly my favorite way to eat them, cold straight from the fridge feels like a mini cheesecake.
Freezer: Wrap muffins individually and freeze for up to 3 months. Thaw overnight in the fridge before eating.
Reheating: A quick 10 to 15 second zap in the microwave brings back that fresh-baked warmth, though I honestly love them cold just as much.
Time-saving tip: Bake a double batch on a Sunday and freeze half. Future you will be very grateful on a busy weekday morning when breakfast is already done.
FAQ
Can I use fresh pumpkin instead of canned?
Yes, just make sure it’s well drained. Fresh pumpkin puree holds more water, and extra moisture can throw off the texture of the muffins.
Why did my cheesecake filling sink to the bottom?
This usually happens if the pumpkin batter is too thin or the filling is too warm when added. Make sure your filling has cooled slightly and your batter isn’t overly runny.
Can I turn this into a loaf instead of muffins?
Yes, though you’ll need to adjust the bake time to around 50 to 55 minutes and check with a toothpick since loaves take longer to set through the middle.
Do these need to be refrigerated?
Because of the cream cheese filling, yes, they should be refrigerated if you’re not eating them within a few hours.
Can I make mini muffins instead?
Absolutely. Just reduce the bake time to about 12 to 14 minutes and keep a close eye on them.
What if I don’t have a stand mixer for the filling?
A hand mixer works perfectly fine, or even just a whisk and a bit of elbow grease since the cream cheese is soft.
Why is my cheesecake filling cracking on top?
This usually means the oven ran a little hot, or the muffins baked a touch too long. Cheesecake fillings like a gentle bake, so pulling them the moment the pumpkin part sets helps avoid cracks.
Can I double this recipe?
Yes, this recipe doubles well. Just bake in batches if your oven can’t fit two muffin tins at once, since crowding the oven can lead to uneven baking.
Wrapping Up
These pumpkin cheesecake muffins are the kind of recipe that gets requested again before you’ve even finished the first batch.
They’re soft, a little tangy, packed with warm spice, and honestly kind of impressive for how simple they are to pull together.
Give them a try this weekend and let me know in the comments how they turned out. And if you tweak the recipe with your own twist, I’d love to hear about that too.