My grandmother never used a recipe card for this one.
She just knew. A handful of this, a splash of that, and three hours later the whole house smelled like something you wanted to crawl inside of.
I spent years trying to recreate it from memory. Burnt onions, mushy carrots, one truly disastrous attempt with red wine I definitely should not have added.
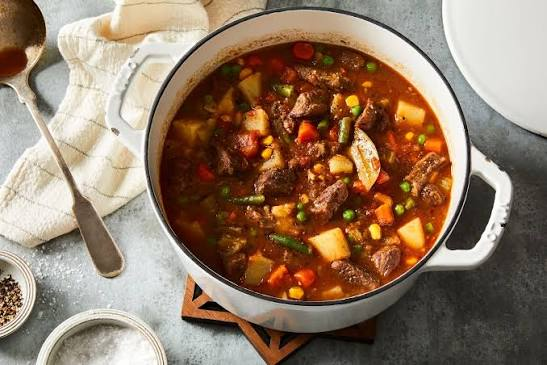
This version finally tastes like hers. And I’m not exaggerating when I say it took me four tries to get the beef this tender.
The breakthrough came when I stopped rushing it. Grandma’s stew was never a quick weeknight thing. It sat on the stove for hours while she did other things around the house, and that patience is exactly what makes the beef fall apart with just a fork.
Side Note: If you’ve only ever had stew from a can, this is going to change your whole opinion on what stew can be.
I still remember coming inside from playing in the yard and just knowing, from the smell alone, that it was a stew day. No announcement needed.
Why This One Actually Works
Most beef stew recipes rush the browning step. That’s the mistake.
Searing the beef properly before it ever touches liquid is what builds the deep, almost caramelized flavor in the broth. Skip it, and you get gray meat swimming in bland gravy.
The other trick? Low and slow. This isn’t a 30-minute meal, and honestly, that’s the whole point.
Chuck roast is full of connective tissue called collagen. Cook it fast, and it stays tough and rubbery. Cook it slow, and that same collagen melts down into gelatin, which is exactly what gives the broth its silky, almost velvety texture.
That’s the surprising part most people don’t realize. The thing that makes cheap cuts tough is the exact same thing that makes them incredible once you give it enough time.
What You’ll Need
| Ingredient | Amount |
|---|---|
| Beef chuck roast, cut into 2-inch cubes | 2 lbs |
| Salt | 1 tsp |
| Black pepper | 1/2 tsp |
| All-purpose flour | 3 tbsp |
| Olive oil | 2 tbsp |
| Yellow onion, diced | 1 large |
| Garlic, minced | 3 cloves |
| Beef broth | 4 cups |
| Tomato paste | 2 tbsp |
| Worcestershire sauce | 1 tbsp |
| Bay leaves | 2 |
| Dried thyme | 1 tsp |
| Carrots, chopped into chunks | 4 large |
| Yukon gold potatoes, cubed | 1.5 lbs |
| Celery stalks, chopped | 2 |
| Frozen peas | 1 cup |
Side Note: Chuck roast is non-negotiable here. Leaner cuts turn tough and chewy over long cook times. Fat is flavor, especially in this recipe.
Tools You’ll Need
- Large Dutch oven or heavy-bottomed pot
- Sharp chef’s knife
- Cutting board
- Wooden spoon
- Measuring cups and spoons
- Tongs
Pro Tips From Someone Who’s Messed This Up Before
- Pat the beef completely dry before searing. Wet meat steams instead of browns, and you’ll lose that crust that makes the broth so rich.
- Don’t crowd the pot. Sear the beef in batches. Overcrowding drops the pan temperature and you end up with boiled meat instead of seared meat.
- Deglaze like your life depends on it. After searing, pour in a splash of the broth and scrape up every brown bit stuck to the bottom. That’s flavor you cannot skip.
- Add potatoes later, not with everything else. They fall apart if they cook the full three hours. I add mine in the last 40 minutes.
- Let it rest for 10 minutes off heat before serving. The stew thickens up and the flavors settle in a way that’s honestly hard to explain until you taste it.
Full Instructions
- Season the beef cubes generously with salt and pepper, then toss with the flour until lightly coated.
- Heat olive oil in a Dutch oven over medium-high heat. Sear the beef in batches until browned on all sides, about 3 minutes per side. Remove and set aside.
- In the same pot, add the diced onion and cook until softened, about 4 minutes. Add garlic and cook for 30 seconds more.
- Pour in a cup of the beef broth and scrape up all the browned bits from the bottom of the pot.
- Stir in the tomato paste, Worcestershire sauce, bay leaves, and thyme.
- Return the beef to the pot along with the remaining broth. Bring to a simmer, then reduce heat to low, cover, and cook for 2 hours.
- Add the carrots and celery. Cover and continue cooking for 40 minutes.
- Add the potatoes and cook for another 30 to 40 minutes, until everything is fork-tender.
- Stir in the frozen peas during the last 5 minutes of cooking.
- Remove the bay leaves, taste, and adjust salt and pepper as needed.
- Let the stew rest for 10 minutes before serving.
Substitutions and Variations
- No chuck roast? Beef short ribs work beautifully and add even more richness.
- Want it thicker? Mash a few potato chunks against the side of the pot near the end.
- Gluten-free? Swap the all-purpose flour for cornstarch, added as a slurry instead of coating the raw meat.
- Slow cooker version: Sear the beef on the stovetop first (don’t skip this part), then transfer everything to a slow cooker on low for 7 to 8 hours.
- Instant Pot version: Pressure cook on high for 35 minutes, then natural release for 15 minutes before adding potatoes and pressure cooking for 5 more minutes.
Make Ahead Tips
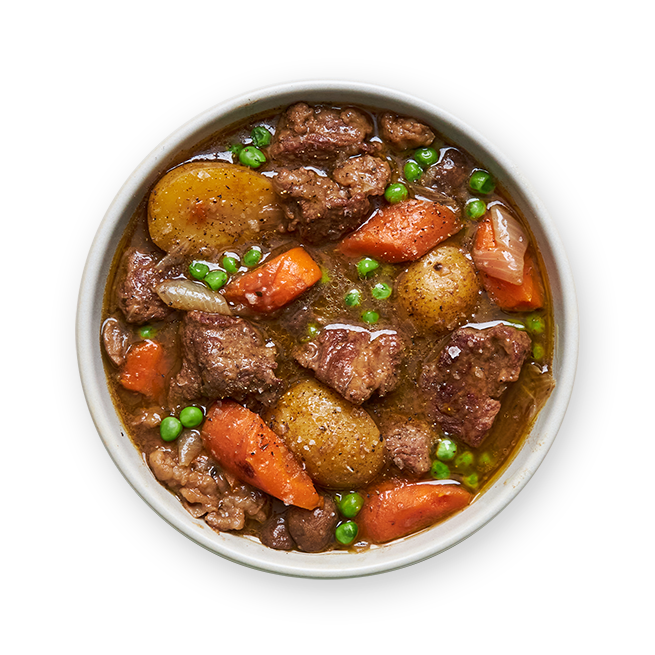
This stew genuinely tastes better the next day. The flavors have more time to meld and deepen overnight.
You can make it up to 3 days ahead and just reheat gently on the stove. It also freezes well for up to 3 months, though I’d hold off on adding the potatoes until you reheat it, since they can get a little grainy after freezing.
Nutritional Breakdown (Per Serving, Estimated)
| Nutrient | Amount |
|---|---|
| Calories | 385 |
| Protein | 32g |
| Carbohydrates | 28g |
| Fat | 16g |
| Fiber | 4g |
| Sodium | 640mg |
These numbers are estimates based on standard ingredient brands. Always double check against your specific products if you’re tracking closely.
Cooking Time Efficiency Tips
Chop all your vegetables while the beef sears. There’s dead time during searing anyway, so use it.
You can also brown the beef a day ahead and store it in the fridge. When you’re ready to cook, just pick up at the deglazing step. It shaves a solid 20 minutes off your active time.
Leftovers and Storage
Store leftovers in an airtight container in the fridge for up to 4 days.
To freeze, portion into freezer-safe containers and store for up to 3 months. Thaw overnight in the fridge before reheating on the stove over low heat, adding a splash of broth if it’s thickened up too much.
Side Note: I like freezing individual portions in mason jars. Grab one, reheat, done. Weeknight dinner solved.
Meal Pairing Suggestions
A crusty piece of bread or dinner rolls for soaking up the broth is basically mandatory in my house.
A simple green salad with a light vinaigrette balances out the richness nicely too, if you want something fresh alongside it.
If you’re feeding a bigger crowd, cornbread is another great option. The slight sweetness plays really well against the savory broth, and it holds up better than regular bread if the meal is sitting out for a while.
FAQ
Can I use stew meat instead of chuck roast?
Yes, pre-cut stew meat works fine. Just check that it’s actually chuck, since some packages mix in leaner cuts that won’t get as tender.
Why is my stew meat still tough after cooking?
It usually needs more time, not less. Tough beef in stew almost always means it needs another 20 to 30 minutes of gentle simmering to fully break down.
Can I skip searing the beef?
You technically can, but you’ll lose a huge amount of flavor. It’s worth the extra 10 minutes.
What’s the best pot for this recipe?
A Dutch oven holds heat evenly and works well for the long simmer. A regular heavy-bottomed pot works too, just keep an eye on the heat level.
Can I add wine?
A half cup of dry red wine added after deglazing can add nice depth. Just let it reduce for a couple minutes before adding the broth.
How do I know when the stew is actually done?
The beef should shred easily with a fork with almost no resistance. If it still feels firm or springs back, it needs more time, even if the vegetables are already soft.
Can I make this ahead for a dinner party?
Yes, and honestly I’d recommend it. Make it the day before, refrigerate overnight, and reheat gently before serving. You’ll get better flavor and one less thing to manage on the day of.
Wrapping Up
There’s a reason recipes like this one get passed down for generations.
It’s not flashy. It doesn’t need to be. It just tastes like home, and that’s worth more than any trendy ingredient ever could be.
Give this one a try this weekend, and let me know in the comments how it turned out. I’d also love to hear if your family has their own version of this classic. 🍲