What if I told you the best dessert on your table this year isn’t chocolate?
I know. Blasphemy in some households.
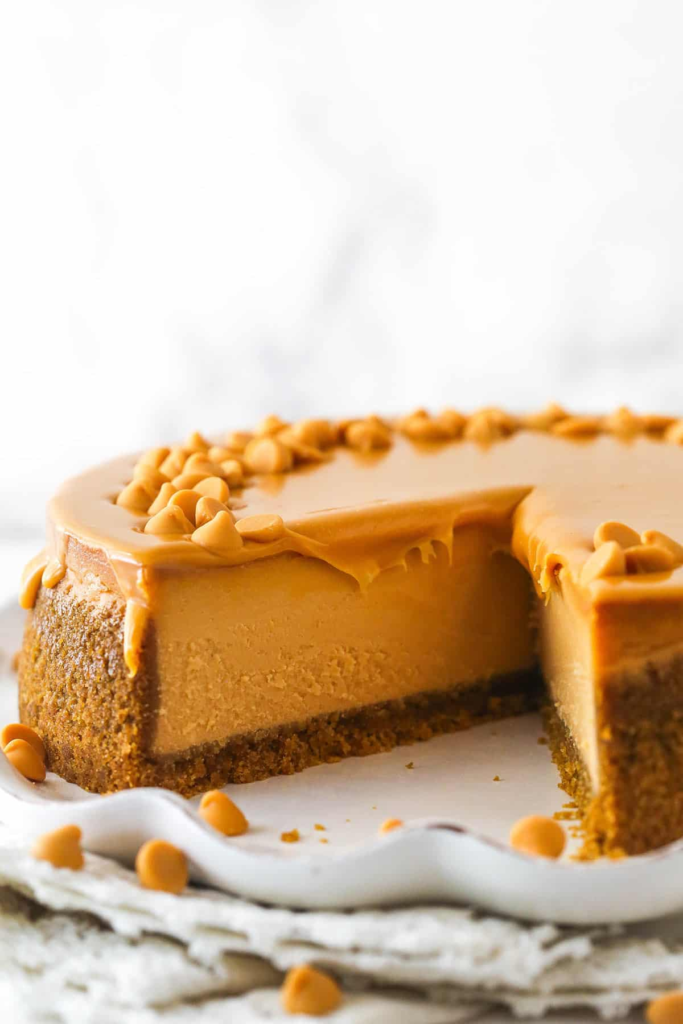
But butterscotch cheesecake has this deep, almost caramel-meets-brown-sugar flavor that chocolate just can’t touch. It’s cozy. It’s a little nostalgic. And it makes people go quiet for a second when they take that first bite.
I’ve made this cheesecake for three different holidays now, and every single time, someone asks for the recipe before they’ve even finished their slice.
So here it is. Every step, every tip, and a few mistakes I made so you don’t have to.
Why This Recipe Works
Butterscotch is basically caramel’s cozier cousin. It’s made with brown sugar instead of white, which gives it that deep, almost toffee-like flavor.
When you fold that into a classic New York style cheesecake, something magical happens. The tang from the cream cheese balances out the sweetness. And the graham crust adds just enough crunch to keep every bite interesting.
Side Note: If you’ve never made a water bath cheesecake before, don’t stress. I break it down step by step below, and it’s way less intimidating than it sounds.
What You’ll Need
Here’s everything you’ll need to pull this off.
For the crust:
- 2 cups graham cracker crumbs (about 16 full sheets)
- 6 tablespoons unsalted butter, melted
- 3 tablespoons brown sugar
- Pinch of salt
For the cheesecake filling:
- 32 oz cream cheese, room temperature (four 8 oz blocks)
- 1 cup brown sugar, packed
- 1/4 cup granulated sugar
- 1/3 cup sour cream
- 3 large eggs, room temperature
- 1 egg yolk
- 2 tablespoons all purpose flour
- 1 tablespoon vanilla extract
- 1/2 cup butterscotch sauce (store-bought or homemade, recipe below)
- 1/2 teaspoon salt
For the homemade butterscotch sauce (optional but worth it):
- 1 cup brown sugar, packed
- 1/2 cup heavy cream
- 4 tablespoons unsalted butter
- 1 teaspoon vanilla extract
- 1/2 teaspoon salt
For topping:
- Extra butterscotch sauce
- Whipped cream
- Toffee bits or crushed pretzels for crunch
Tools You’ll Need
- 9 inch springform pan
- Large roasting pan (for the water bath)
- Heavy duty aluminum foil
- Stand mixer or hand mixer
- Rubber spatula
- Small saucepan
- Food processor (or a ziplock bag and rolling pin for crushing crackers)
How to Make Butterscotch Cheesecake
Step 1: Make the crust
Preheat your oven to 325°F.
Mix the graham cracker crumbs, melted butter, brown sugar, and salt in a bowl until it looks like wet sand.
Press it firmly into the bottom of your springform pan. I use the bottom of a measuring cup to really pack it down.
Bake for 10 minutes, then set aside to cool while you make the filling.
Step 2: Wrap your pan
Wrap the outside of your springform pan in two or three layers of heavy duty foil.
This keeps water from sneaking in during the water bath. Trust me, you don’t want a soggy crust after all this effort.
Step 3: Make the butterscotch sauce
Skip this step if you’re using store-bought.
Melt the butter in a saucepan over medium heat. Add the brown sugar and cream, stirring constantly until it’s smooth and glossy.
Let it simmer for 2 to 3 minutes, then remove from heat and stir in the vanilla and salt.
Let it cool completely before using it in the filling.
Step 4: Make the cheesecake batter
Beat the cream cheese in a large bowl until it’s completely smooth. No lumps allowed.
Add the brown sugar and granulated sugar, and beat until combined.
Mix in the sour cream, flour, vanilla, and salt.
Add the eggs and egg yolk one at a time, mixing on low speed after each addition. Don’t overmix here. Overmixing adds air to the batter, and air causes cracks.
Pour in the cooled butterscotch sauce and gently fold it through with a spatula.
Step 5: Bake in a water bath
Pour the batter over your cooled crust.
Place the wrapped springform pan into your roasting pan, then carefully pour hot water into the roasting pan until it reaches about halfway up the sides of the springform pan.
Bake for 60 to 70 minutes. The center should still jiggle slightly when you gently shake the pan.
Step 6: Cool it slowly
Turn off the oven and crack the door open. Let the cheesecake sit in the cooling oven for an hour.
This slow cooldown is the secret to avoiding cracks on top.
After an hour, remove it from the oven and let it come to room temperature, then refrigerate for at least 6 hours, but overnight is better.
Step 7: Add your toppings
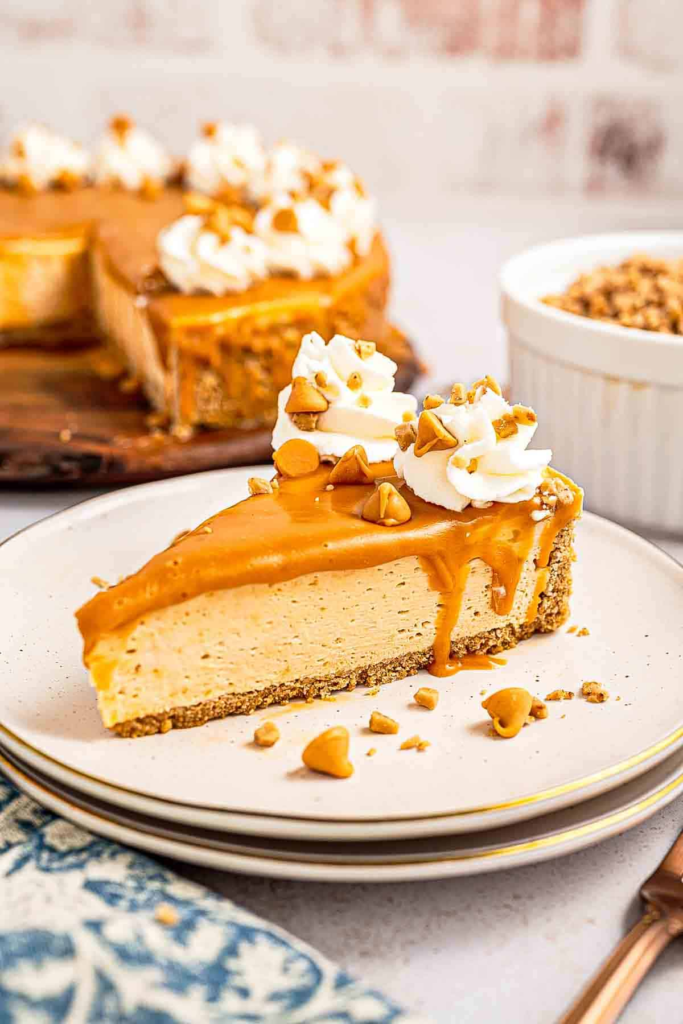
Once fully chilled, drizzle with extra butterscotch sauce, pipe on some whipped cream, and sprinkle toffee bits over the top.
Slice with a warm knife for the cleanest cuts.
Pro Tips
- Room temperature everything. Cold cream cheese and cold eggs cause lumps that never fully smooth out. Set your ingredients out an hour before you start.
- Don’t skip the water bath. It sounds fussy, but it’s what gives you that ultra creamy texture instead of a dense, dry one.
- Tap out the air bubbles. Before baking, gently tap the filled pan on the counter a few times to release trapped air.
- A cheesecake that jiggles is a good sign. It’ll firm up as it cools. Overbaking is the number one reason cheesecakes crack or turn rubbery.
- Use a hot, clean knife for slicing. Run it under hot water, wipe it dry, then slice. Repeat between each cut for bakery-style slices.
Substitutions and Variations
Want to switch things up? Here’s what actually works.
| Original | Substitute | Notes |
|---|---|---|
| Graham crackers | Digestive biscuits or vanilla wafers | Same buttery crunch, slightly different flavor |
| Sour cream | Full fat Greek yogurt | Keeps the tang, slightly less rich |
| Homemade butterscotch | Store-bought caramel sauce | Sweeter and less deep in flavor, but works in a pinch |
| Toffee bits | Chopped pecans | Adds a nutty crunch instead |
If you’re going gluten free, swap the graham crackers for a certified gluten free version. Everything else in this recipe is naturally gluten free.
Make Ahead Tips
This cheesecake is actually better made a day ahead. The flavors deepen and the texture firms up nicely overnight.
You can make it up to 3 days in advance. Just hold off on the whipped cream topping until right before serving.
Leftovers and Storage
Store leftover cheesecake covered in the fridge for up to 5 days.
Want to freeze it? Wrap individual slices tightly in plastic wrap, then foil, and freeze for up to 2 months. Thaw overnight in the fridge before eating.
Skip freezing it with the whipped cream on top. It doesn’t thaw well.
FAQ
Why did my cheesecake crack?
Usually it’s from overbaking, overmixing, or a fast temperature change. Following the slow cooldown step above should fix this.
Can I make this without a water bath?
You can, but you’re more likely to get cracks and a denser texture. If you skip it, place a pan of hot water on the rack below your cheesecake instead.
How do I know when it’s done baking?
The edges should look set, but the center should still have a slight jiggle, almost like Jell-O. It firms up completely once chilled.
Can I use a store-bought crust?
Yes, a pre-made graham crust works fine if you’re short on time. Just know it’ll be a bit thinner than a homemade one.
Is butterscotch the same as caramel?
Not quite. Caramel is made with white sugar, while butterscotch uses brown sugar, giving it a deeper, almost toffee like flavor.
Can I make this into mini cheesecakes instead?
Yes. Use a muffin tin lined with cupcake liners, and cut the bake time down to about 18 to 20 minutes. Skip the water bath for minis, they don’t need it.
My batter looks lumpy. Did I ruin it?
Probably not. Lumpy batter almost always means the cream cheese was too cold. Let it sit out longer next time, or gently warm the bowl over a pot of warm water for a minute before mixing.
Nutrition Estimate
Just a rough estimate per slice, based on 12 slices per cheesecake. This will shift depending on your exact brands and portion sizes, so treat it as a starting point rather than an exact number.
| Nutrient | Approximate Amount |
|---|---|
| Calories | 420 |
| Fat | 27g |
| Carbohydrates | 38g |
| Sugar | 29g |
| Protein | 7g |
Cooking Time Efficiency Tips
Short on time? Here’s how to speed things up without cutting corners.
- Make the butterscotch sauce a day early. It keeps in the fridge for up to a week, so this step doesn’t have to happen the same day.
- Soften cream cheese fast. Cut it into cubes and let it sit out for 20 minutes instead of leaving whole blocks out for an hour.
- Skip the stovetop butterscotch entirely. A good quality store-bought jar saves you a solid 15 minutes with barely any difference in the final flavor.
Wrapping Up
This butterscotch cheesecake has a way of turning an ordinary Tuesday into something worth remembering.
It’s rich, it’s creamy, and that butterscotch flavor is the kind of thing people talk about long after the plates are cleared.
Give it a try this week, and come back and let me know how it turned out in the comments. I read every single one.
Got questions about the water bath or the butterscotch sauce? Drop them below and I’ll help you troubleshoot.