There’s a specific sound people make when this cake comes out. It’s somewhere between a gasp and a laugh, and it happens before anyone’s even tasted it.
That’s the drip cake effect. It looks like something from a bakery window, but it’s genuinely doable in a regular kitchen with regular ingredients.
I’ve made this exact cake for three different birthdays this year alone. Same base recipe every time, slightly different toppings depending on who’s asking for candles.
Today I’m breaking down exactly how I build it, step by step, so you can make one that looks just as good the first time you try.
Side Note: If chocolate isn’t the birthday person’s thing, you can swap the cake base for vanilla or funfetti and keep the same frosting and drip method. More on that below.
What You’ll Need
Here’s everything that goes into this cake, broken down by section so nothing gets missed.
For the cake layers:
- 2 cups all-purpose flour
- 2 cups granulated sugar
- ¾ cup unsweetened cocoa powder
- 2 tsp baking soda
- 1 tsp baking powder
- 1 tsp salt
- 2 large eggs
- 1 cup buttermilk
- 1 cup hot coffee (or hot water)
- ½ cup vegetable oil
- 2 tsp vanilla extract
For the chocolate frosting:
- 1 cup unsalted butter, softened
- 3½ cups powdered sugar
- ¾ cup unsweetened cocoa powder
- ⅓ cup heavy cream
- 2 tsp vanilla extract
- pinch of salt
For the chocolate drip:
- 1 cup semisweet chocolate chips
- ½ cup heavy cream
For the topping:
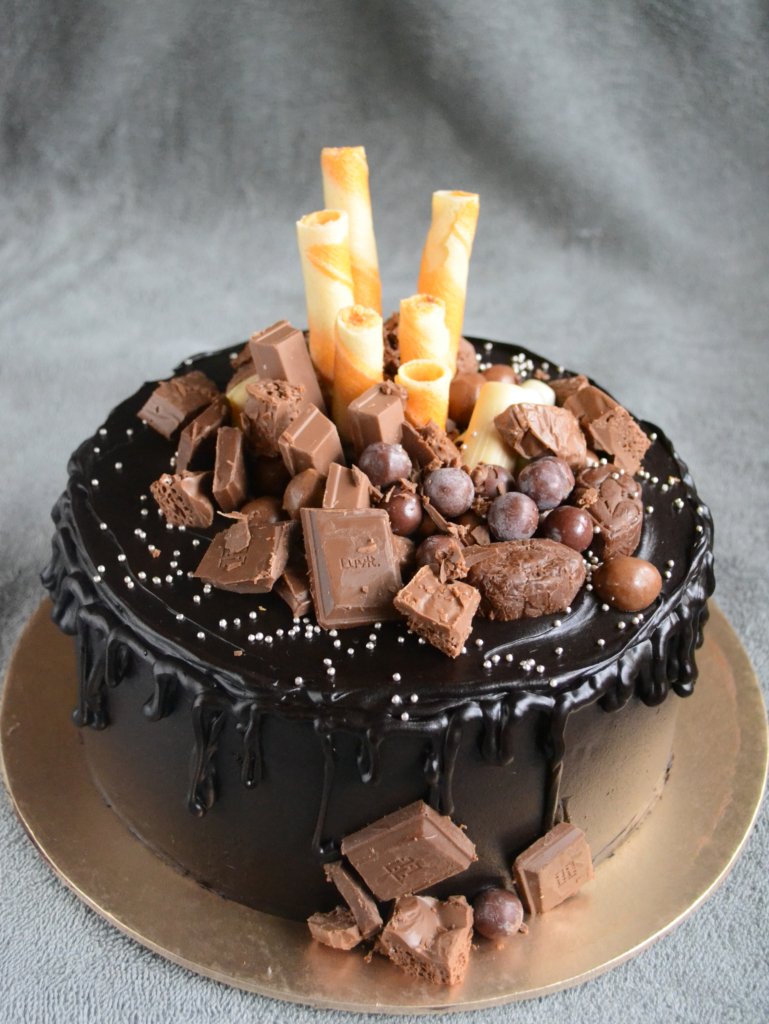
- 10 to 12 chocolate sandwich cookies, some whole and some halved
- 8 to 10 chocolate malt balls or chocolate truffles
- A few pieces of a chopped chocolate bar
- Rainbow sprinkles
- Birthday candles
Tools You’ll Need
- Two 8-inch round cake pans
- Stand mixer or hand mixer
- Large mixing bowls
- Offset spatula
- Piping bag fitted with a star tip
- Squeeze bottle or spoon (for the drip)
- Wire cooling rack
- Parchment paper
How to Make It
Bake the cake layers
- Preheat your oven to 350°F. Grease two 8-inch cake pans and line the bottoms with parchment paper.
- In a large bowl, whisk together the flour, sugar, cocoa powder, baking soda, baking powder, and salt.
- Add the eggs, buttermilk, oil, and vanilla. Mix until combined.
- Slowly pour in the hot coffee, mixing on low. The batter will be thin. That’s normal.
- Divide the batter evenly between your two pans.
- Bake for 30 to 35 minutes, until a toothpick comes out clean.
- Let the cakes cool in the pans for 10 minutes, then transfer to a wire rack to cool completely.
Side Note: Don’t skip the full cooling step. Warm cake plus frosting equals a melty mess, and nobody wants that on a birthday.
Make the frosting
- Beat the softened butter on medium speed until it’s pale and fluffy, around 3 minutes.
- Add the cocoa powder and half the powdered sugar. Mix on low until combined.
- Add the remaining powdered sugar, heavy cream, vanilla, and salt.
- Beat on medium-high for 2 to 3 minutes, until light and spreadable.
Assemble and frost
- Level the tops of both cake layers with a serrated knife if they domed while baking.
- Place the first layer on your cake stand and spread a thick layer of frosting on top.
- Add the second layer and frost the entire cake with a thin crumb coat.
- Chill the cake for 15 minutes, then apply a final, thicker layer of frosting all over.
Make the drip
- Heat the heavy cream until it’s steaming but not boiling.
- Pour it over the chocolate chips and let it sit for 2 minutes.
- Stir until smooth and glossy.
- Let it cool for 5 to 10 minutes. You want it pourable, not hot.
- Spoon it around the top edge of the cake, letting it drip down the sides.
- Fill in the center with the remaining ganache.
Decorate
- Pipe frosting swirls around the top edge using your star tip.
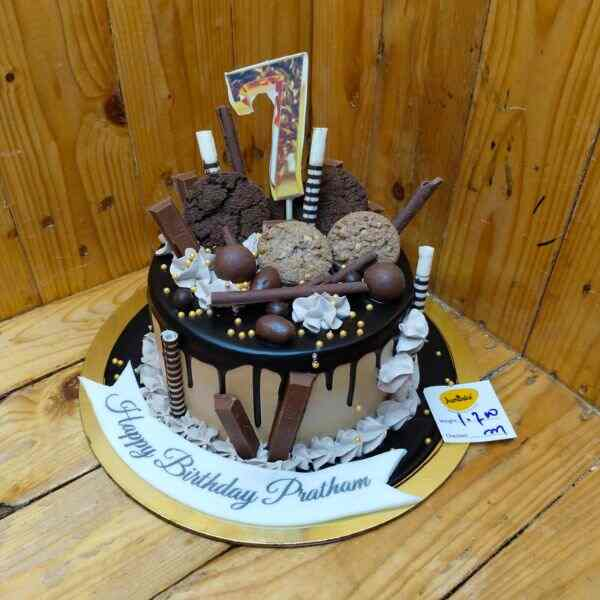
- Add the cookies, chocolate pieces, and malt balls in clusters.
- Scatter sprinkles over the top.
- Add candles right before serving.
Pro Tips
- Room temperature everything. Cold eggs and cold buttermilk make the batter lumpy. Set them out 30 minutes before you start.
- Test your ganache on a plate first. Drip a spoonful onto a cold plate before you commit to the cake. If it runs too fast, let it cool a few more minutes.
- Chill between coats. The crumb coat step feels unnecessary until you skip it and end up with chocolate crumbs in your white frosting.
- Work from the outside in. Do your drip first, then fill the center. It’s much easier to control than trying to drip over a fully frosted top.
- Buy an extra bag of cookies. You will eat some while decorating. This is not optional, it’s just how it works.
Substitutions and Variations
- Cake base: Swap the chocolate cake for a vanilla or funfetti base if that’s more the birthday person’s speed. Keep the same frosting and drip.
- Coffee: Not a coffee fan? Hot water works fine and won’t add a coffee flavor either way. The heat is just there to bloom the cocoa.
- Frosting flavor: Swap the chocolate frosting for a vanilla buttercream if you want more contrast against the drip.
- Topping swap: Use pretzels, mini candy bars, or fresh berries instead of the malt balls and cookies for a different look.
- Gluten-free version: A 1:1 gluten-free flour blend works well here. The texture stays close to the original.
- Dairy-free version: Swap the butter for a plant-based stick butter, the buttermilk for a dairy-free milk plus a tablespoon of vinegar, and the heavy cream for full-fat coconut cream.
Make Ahead Tips
- Bake the cake layers up to two days ahead. Wrap them tightly in plastic wrap once fully cooled and keep them at room temperature.
- The frosting can be made up to three days ahead. Store it in an airtight container in the fridge, then let it come back to room temperature and re-whip before using.
- You can also freeze the unfrosted layers for up to a month. Thaw them overnight in the fridge before assembling.
Nutrition (Estimated)
This is a rough estimate based on 12 slices and will vary depending on the exact brands you use.
| Nutrient | Per Slice |
|---|---|
| Calories | ~520 |
| Total Fat | 24g |
| Carbohydrates | 74g |
| Sugar | 58g |
| Protein | 5g |
Please treat this table as a starting point, not a guarantee. Actual numbers shift based on brands and portion size.
Leftovers and Storage
- Store the cake in an airtight container at room temperature for up to 2 days, or in the fridge for up to 5 days.
- Let refrigerated slices sit out for 20 to 30 minutes before eating so the frosting can soften back up.
- You can freeze fully assembled slices. Wrap each one individually in plastic wrap, then foil, and freeze for up to 2 months. Thaw in the fridge overnight.
FAQ
Can I make this as cupcakes instead?
Yes. This batter makes about 24 cupcakes. Bake at 350°F for 18 to 20 minutes.
Why is my ganache too thin?
It probably needs more cooling time. Let it sit at room temperature and check it every 5 minutes until it coats a spoon without running right off.
Can I use a box mix instead of baking from scratch?
You can. Two boxes of chocolate cake mix will get you close to the same amount of batter for this size cake.
Why did my cake dome in the middle?
Ovens run hot in different spots and this is completely normal. A serrated knife levels it out in seconds before you frost.
How far ahead can I decorate the whole cake?
The fully decorated cake holds well in the fridge for up to 2 days. Add the candles right before serving so they stay put.
Wrapping Up
This cake looks like it took hours of practice, but it really just comes down to a few simple steps done in the right order.
Bake the layers, chill between coats, control your drip, then have fun with the toppings.
Make it once and you’ll probably understand why I keep reaching for this same recipe every time someone’s birthday rolls around.
If you try this one, come back and drop a comment below. I’d love to hear how it turned out and what toppings you went with.