Most zucchini fritters fall apart the second they hit the pan.
Mine don’t. And after burning through more zucchini than I’d like to admit, I finally figured out why.
It comes down to one step everyone skips. Squeeze the water out of your zucchini like you mean it. Skip that, and you’re basically frying a puddle.
Do it right, and you get golden, crispy edges with a soft, cheesy center that tastes way fancier than the 20 minutes it actually takes.
These are the kind of fritters that disappear off the plate before you even sit down to eat. I’ve made a double batch and still ended up with none left for lunch the next day.
Side Note: If your zucchini plant is currently trying to bury you in produce, this recipe is basically a rescue mission.
Why This Recipe Works
Zucchini is about 95% water. That’s the whole problem and the whole secret at the same time.
Once you pull most of that water out ahead of time, the batter has nothing to fight against. It fries instead of steams, which is exactly why you end up with crispy edges instead of a soggy pancake.
Parmesan adds a salty, savory backbone. Baking powder gives just enough lift so the fritters don’t turn dense. And garlic plus green onion means every bite actually tastes like something, instead of just tasting like “vegetable.”
Simple ingredients, one important technique. That’s the whole recipe.
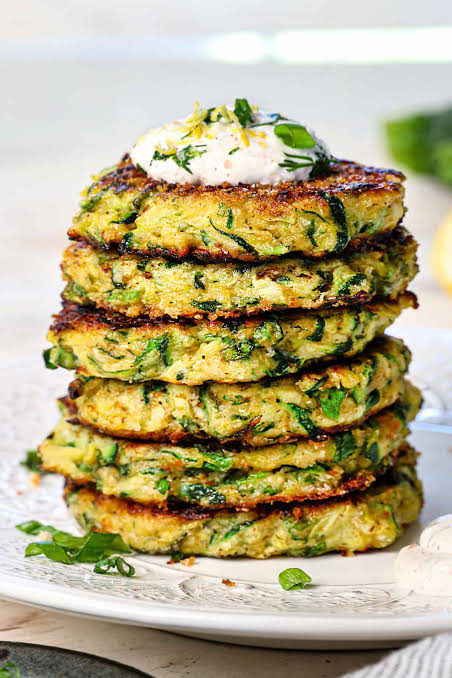
What You’ll Need
Here’s everything that goes into the batter. Nothing fancy, nothing you can’t grab at a regular grocery store.
- 2 medium zucchinis, grated
- 1 teaspoon salt
- 2 large eggs
- 1/4 cup all-purpose flour
- 1/4 cup grated Parmesan cheese
- 2 green onions, chopped
- 2 cloves garlic, minced
- 1/2 teaspoon baking powder
- 1/4 teaspoon black pepper
- Olive oil, for frying
That’s it. Nine ingredients (plus salt) standing between you and one of the easiest, most satisfying snacks you’ll make this week.
Tools You’ll Need
- Box grater (or the grating attachment on a food processor)
- Clean kitchen towel or cheesecloth
- Large mixing bowl
- Large nonstick skillet or cast iron pan
- Spatula
- Measuring cups and spoons
How to Make Zucchini Fritters
Step 1: Prep the zucchini
Grate your zucchinis and dump them onto a clean kitchen towel.
Sprinkle with the salt and let it sit for 10 minutes. The salt pulls the water out.
Now gather the towel up and squeeze. Hard. You’ll be shocked at how much liquid comes out of what looked like dry shredded zucchini.
This is the step that makes or breaks your fritters. Skip it, and your batter turns to soup the second it touches the pan.
Step 2: Make the batter
Whisk your eggs in a large bowl.
Add the flour, Parmesan, green onions, garlic, baking powder, and pepper. Mix until combined.
Fold in your squeezed-out zucchini last, so you don’t overwork the batter.
Step 3: Cook the fritters
Heat a generous layer of olive oil in your skillet over medium heat.
Scoop about 2 tablespoons of batter per fritter and flatten it gently with the back of your spoon.
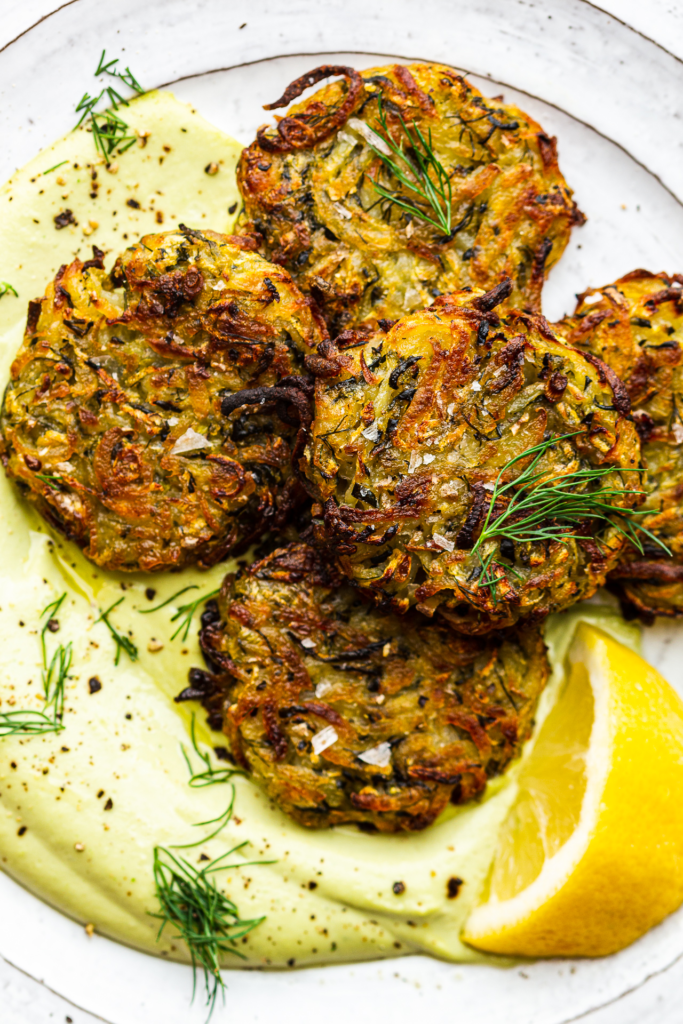
Cook for 3 to 4 minutes per side, until deeply golden and crispy. Don’t rush this part. Medium heat gives the inside time to cook through while the outside gets properly crisp.
Step 4: Serve
Serve them warm, straight out of the pan.
Sour cream, Greek yogurt, or your favorite dipping sauce all work great here.
Pro Tips
- Squeeze twice if you have to. If your kitchen towel is soaked after the first squeeze, wrap it up again and go another round. Extra moisture is the number one reason fritters turn soggy or fall apart in the pan.
- Don’t crowd the pan. Give each fritter a little breathing room. Overcrowding drops the oil temperature and you end up steaming them instead of frying.
- Test your oil first. Drop a tiny bit of batter in before you commit the whole batch. If it sizzles right away, you’re good to go.
- Flatten gently, not aggressively. You want a fritter that’s thin enough to cook through but thick enough to hold together. About half an inch is the sweet spot.
- Keep them warm the right way. If you’re frying in batches, hold the finished fritters on a wire rack in a low oven (around 200°F) instead of stacking them on a plate. Stacking traps steam and softens the crispy edges.
Substitutions and Variations
This recipe is forgiving, so feel free to play around.
| Original | Swap | Notes |
|---|---|---|
| All-purpose flour | Gluten-free 1:1 flour blend | Works well, texture stays similar |
| Parmesan cheese | Pecorino Romano | Sharper, saltier flavor |
| Green onions | Chives or a small yellow onion | Reduce quantity if using yellow onion |
| Olive oil | Avocado oil | Higher smoke point, great for frying |
| Zucchini | Yellow squash | Same method, slightly milder flavor |
Want extra flavor? A pinch of red pepper flakes in the batter adds a nice kick without overpowering the zucchini. Fresh dill or basil is also a great addition if you have some on hand.
For a low-carb version, skip the flour entirely and use almond flour instead. The texture is slightly denser, but the fritters still hold together well and crisp up nicely.
For extra protein, stir a spoonful of cottage cheese into the batter along with the eggs. It disappears into the mix but boosts the protein count without changing the flavor.
Make Ahead Tips
You can grate and salt the zucchini up to a day ahead. Just keep it in the fridge, squeezed and ready to go, so all you have to do the next day is mix and fry.
The batter itself doesn’t hold as well once it’s mixed, since the baking powder starts working right away. If you can, mix it right before you cook.
Nutrition (Estimated)
These numbers are per fritter, based on a batch of 12. Treat them as a general estimate, not an exact count, since brands and portion sizes vary.
| Nutrient | Amount |
|---|---|
| Calories | ~65 |
| Protein | 3g |
| Carbs | 3g |
| Fat | 4g |
| Fiber | 0.5g |
If you’re watching sodium, cut the added salt slightly since the Parmesan already brings plenty.
Storage and Leftovers
Let any leftover fritters cool completely before storing. Warm fritters in a sealed container turn soft fast.
- Fridge: Store in an airtight container for up to 3 days.
- Freezer: Freeze in a single layer on a baking sheet first, then transfer to a freezer bag. They’ll keep for about 2 months.
- Reheating: Skip the microwave if you care about the crispy texture. A skillet over medium heat for a few minutes per side, or an air fryer at 350°F for 4 to 5 minutes, brings them right back to life.
FAQ
Why did my fritters turn out soggy?
Almost always moisture. Zucchini is mostly water, so if you skip the salting and squeezing step, that water ends up in your batter instead of on your towel.
Can I bake these instead of frying them?
Yes, though you’ll lose some of the crispy edges. Bake at 425°F on a lined sheet for about 20 minutes, flipping halfway through.
What can I serve these with?
They’re great as a light meal with a side salad, as an appetizer with dipping sauce, or as a side dish next to grilled chicken or fish.
Can I make these dairy-free?
Yes. Leave out the Parmesan or swap in a dairy-free alternative. The fritters will be slightly less rich, but they’ll still hold together fine.
How do I know when to flip them?
Look for a deep golden color creeping up the edges. If the fritter still looks pale on the bottom, give it another minute before flipping.
Do I need to peel the zucchini first?
No need. The skin is soft, adds a bit of color, and softens completely once it’s grated and cooked. Peeling is purely optional.
Can I double the batch?
Absolutely, and it’s worth it since these disappear fast. Just work in batches when frying so you don’t crowd the pan, and keep finished fritters warm in a low oven while you finish the rest.
Cooking Time Efficiency Tips
If you’re short on time, prep the zucchini the night before and store it squeezed and covered in the fridge.
That turns this into a 10 minute recipe the next day, since all that’s left is mixing and frying.
You can also grate the zucchini and mince the garlic at the same time to save a few extra minutes at the cutting board.
Wrapping Up
Zucchini fritters are one of those recipes that looks impressive but takes almost no real effort once you know the trick.
Squeeze out the water, don’t rush the pan, and you’re set.
Make a batch this week and let me know how they turned out in the comments below. And if you tried any of the variations above, I’d love to hear which one you went with.