15-Minute Skillet Peppers (The Recipe You’ll Make on Repeat)
I used to think skillet peppers were a “throw it in and hope” kind of side dish.
Turns out there’s a right way and a wrong way to do this. And once I figured out the right way, I started putting these peppers on absolutely everything.
Sausage and peppers. Steak fajita bowls. Scrambled eggs. Straight off the fork standing at the stove (no judgment).
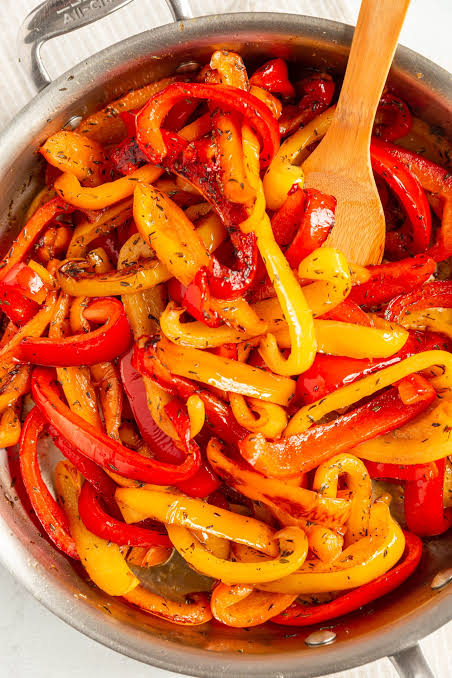
This is a 15-minute, one-skillet recipe. No marinating, no fancy equipment, no 12-ingredient list. Just peppers that go from raw and crunchy to soft, sweet, and slightly charred in the time it takes to set the table.
Side Note: If you’ve ever had rubbery, sad, gray peppers from a skillet, it’s almost always one mistake. I’ll cover exactly what that is below so it never happens to you again.
Why This Recipe Works
Bell peppers have a ton of natural sugar in them. Most people don’t realize that until they cook one down properly.
High heat plus a little patience is what pulls that sugar out and turns it into caramelization. That’s the difference between “meh, peppers” and peppers you actually crave.
Here’s the quick version of what makes this method work:
- High heat first to get color on the peppers before they turn mushy
- Sliced thin and even so every piece cooks at the same rate
- Minimal stirring because peppers need contact time with the pan to actually char
- Salt added at the right moment, not too early, so they don’t just steam in their own juice
That’s really it. It’s a simple recipe, but the timing matters more than people expect.
How to Pick the Best Peppers
A few seconds at the grocery store makes a real difference here.
Look for peppers that feel heavy for their size and have tight, glossy skin. That weight usually means more moisture and better flavor once cooked.
Avoid any with soft spots, wrinkled skin, or a dull finish. Those are signs the pepper has been sitting around longer than it should have.
Side Note: Peppers with three or four bumps on the bottom tend to be slightly sweeter than the ones with just two or three. It’s a small thing, but it’s true often enough to be worth checking.
What You’ll Need
| Ingredient | Amount |
|---|---|
| Bell peppers (mixed colors) | 4 large, sliced into strips |
| Yellow onion | 1 medium, sliced |
| Olive oil or avocado oil | 2 tablespoons |
| Garlic | 2 cloves, minced |
| Salt | 1/2 teaspoon, plus more to taste |
| Black pepper | 1/4 teaspoon |
| Smoked paprika | 1/2 teaspoon (optional, but I never skip it) |
| Red pepper flakes | A pinch, if you like heat |
That’s the whole list. No specialty ingredients, no trip to a separate grocery aisle.
Side Note: Mix your pepper colors if you can. Red and yellow peppers are sweeter than green, and having all three in the pan makes the dish taste more complex without any extra work.
Tools You’ll Need
- A large skillet (cast iron works best for real char, but any heavy-bottomed pan will do)
- A sharp knife
- A cutting board
- Tongs or a wooden spoon for tossing
How to Make 15-Minute Skillet Peppers
- Slice your vegetables. Cut the bell peppers into even strips, about 1/4 inch thick. Slice the onion the same way. Even slices mean even cooking, so don’t rush this part.
- Heat the pan. Add the oil to your skillet and heat it over medium-high until it shimmers. This should take about a minute. You want the pan hot before anything touches it.
- Add the peppers and onion. Spread them out in a single layer as best you can. Let them sit undisturbed for 2 to 3 minutes before you touch them again. This is the step almost everyone skips, and it’s the one that gives you actual color instead of steamed, floppy peppers.
- Stir occasionally, not constantly. Toss every couple of minutes so different sides get contact with the pan. Total cook time here is about 8 to 10 minutes, until the peppers are tender with some blistered, charred edges.
- Add the garlic and seasoning. Stir in the garlic, salt, black pepper, smoked paprika, and red pepper flakes if using. Cook for another minute, just until the garlic is fragrant.
- Taste and adjust. Add more salt if needed. Serve immediately while everything is still hot and slightly crisp.
That’s genuinely the whole process. Fifteen minutes, start to finish, most of which is just standing there smelling something amazing.
Pro Tips
- Don’t crowd the pan. If your skillet is small, cook in two batches. Overcrowded peppers steam instead of char, and steamed peppers taste like nothing.
- Pat your peppers dry if you rinsed them before slicing. Extra moisture is the enemy of a good sear.
- Resist the urge to stir constantly. I know it’s tempting. Let the pan do its job.
- Add an acid at the end. A small squeeze of lime or a splash of balsamic vinegar right before serving brightens up the whole dish in a way that’s hard to explain until you try it.
- Save the pan drippings. If you’re serving these with steak or sausage, cook the peppers in the same skillet after the meat, so they soak up all that flavor left behind.
Substitutions and Variations
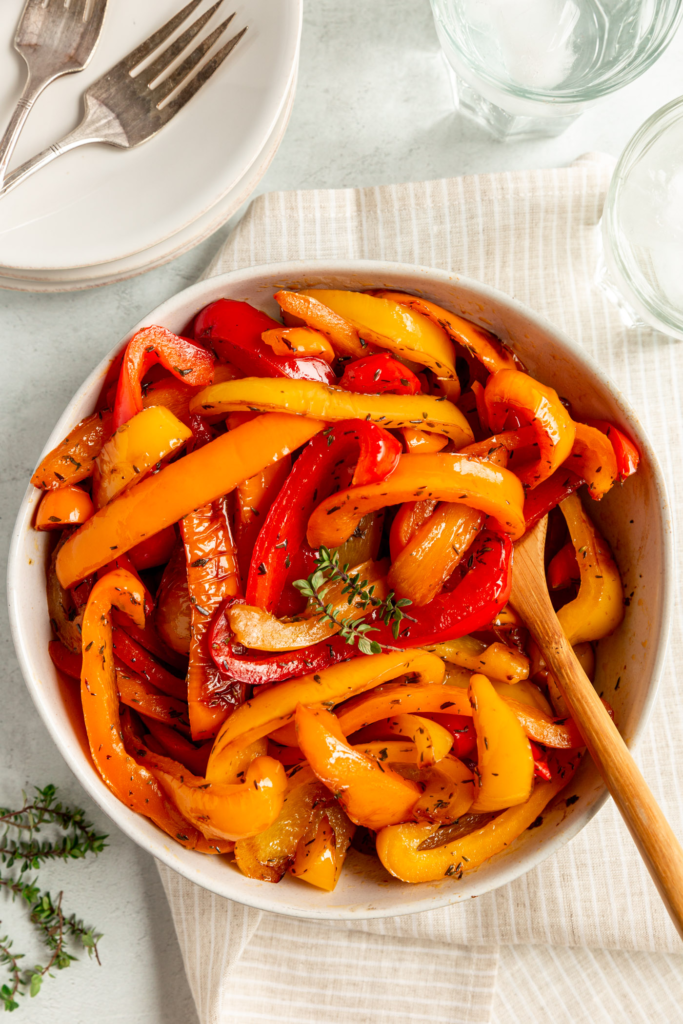
This recipe is basically a blank canvas, so here’s how to make it your own:
- Swap the onion for shallots if you want something milder and slightly sweeter.
- Use ghee or butter instead of oil for a richer, more savory flavor.
- Add mushrooms or zucchini in the last 5 minutes if you want to bulk it up.
- Make it Cajun style with a teaspoon of Cajun seasoning instead of smoked paprika.
- Make it fajita style by adding a squeeze of lime and a pinch of cumin, then serving in warm tortillas.
- Go low-oil by using a splash of broth instead, if you’re watching fat intake. You’ll lose a bit of char, but it still works.
Make-Ahead Tips
You can slice the peppers and onion up to 2 days ahead and store them in an airtight container in the fridge. This turns the whole recipe into a genuine 10-minute meal on a busy night.
I wouldn’t recommend cooking them fully ahead of time, though. They lose that just-charred texture and turn soft and a little watery when reheated. This is one of those recipes that’s really best made fresh.
Nutrition (Per Serving, Estimated)
| Nutrient | Amount |
|---|---|
| Calories | 95 |
| Carbohydrates | 9g |
| Protein | 1g |
| Fat | 7g |
| Fiber | 2g |
| Sugar | 5g |
Side Note: These numbers are estimates based on standard ingredients. If you’re tracking macros closely, plug your exact brands into a calculator like MyFitnessPal to get numbers you can actually rely on.
This recipe is naturally vegan, gluten-free, and paleo-friendly as written, which makes it an easy add to almost any meal plan.
Cooking Time Efficiency Tips
If you’re trying to get dinner on the table even faster, a few small adjustments help.
Slice your peppers and onion the night before and store them in the fridge. That alone cuts this recipe down to about 10 minutes of actual cook time.
You can also prep a double batch of the seasoning mix (salt, pepper, smoked paprika, red pepper flakes) and keep it in a small jar. That way it’s a one-scoop addition instead of measuring out four separate things every time you make this.
What to Serve With Skillet Peppers
Skillet peppers are one of those sides that makes almost anything taste more finished. A few of my favorite pairings:
- Grilled or pan-seared sausage
- Steak fajitas or fajita bowls
- Scrambled or fried eggs for breakfast
- Piled onto a hoagie roll with melted provolone
- Tossed with rice and black beans for a fast vegetarian dinner
Leftovers and Storage
Store leftover peppers in an airtight container in the fridge for up to 4 days.
To reheat, use a hot skillet for a minute or two rather than the microwave. The microwave will make them soft and a little soggy, while the stovetop brings back some of that char.
These also freeze reasonably well for up to 2 months, though the texture softens once thawed. I’d save frozen leftovers for recipes where they’ll be cooked into something else, like a frittata or fajita filling, rather than serving them on their own.
FAQ
Can I use frozen bell peppers?
You can, but drain and pat them very dry first. Frozen peppers release a lot of extra water, which makes charring almost impossible without an extra step or two.
Why are my peppers soggy instead of charred?
This almost always comes down to one of two things: the pan wasn’t hot enough to start, or the peppers were stirred too often. Give them space and time to sit in the pan.
Can I make this recipe spicy?
Yes. Add extra red pepper flakes, a diced jalapeño, or a dash of hot sauce at the end for more heat.
Is this recipe good for meal prep?
It’s better as a fresh side than a make-ahead meal prep item, since the texture changes once refrigerated and reheated. That said, it still tastes good, just softer.
What kind of skillet works best?
Cast iron gives you the best char because it holds heat so well. A stainless steel skillet is a solid second choice. I’d avoid nonstick if you’re going for real caramelization, since it doesn’t get quite as hot.
Wrapping Up
Fifteen minutes is genuinely all it takes to turn a pile of raw peppers into something you’ll want to make again next week.
Give this one a try, and if you land on a variation you love, drop it in the comments. I read every single one, and I’m always looking for new ways to eat my weight in peppers.