I made these wraps on a night when nothing else was going right.
Burnt the first batch of garlic butter. Dropped a whole block of cheese on the floor. Had exactly one tortilla left with a hole in it.
And it still turned out to be one of the best things I’ve made all month.
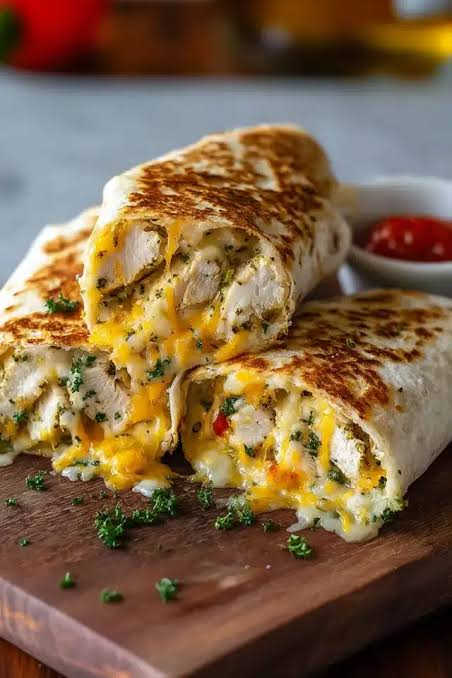
That’s the thing about this recipe. It’s basically impossible to mess up in a way that ruins it. You’ve got garlicky, buttery chicken, a stretchy layer of melted cheese, and a golden crispy wrap holding it all together. Even a rough version of that is still really good.
Side Note: If you’ve had a cheesy garlic bread and a chicken quesadilla and wished they’d just get married already, this is that wedding.
Let’s get into it.
Why This Recipe Works
The garlic butter does double duty here. It flavors the chicken while it cooks, then gets brushed on the outside of the wrap before it hits the pan.
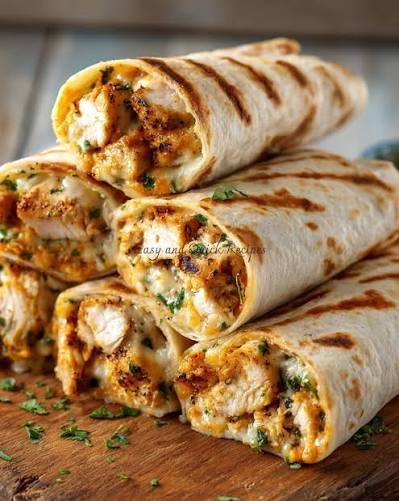
That outside layer is what gives you the crispy, almost garlic-bread-like crust.
The cheese goes in while it’s still warm from cooking, so it melts into every gap instead of sitting there as a cold layer. That’s the difference between a wrap with cheese in it and a wrap that’s actually cheesy all the way through.
And because everything cooks fast (we’re talking 20 minutes, start to finish), this fits into an actual weeknight. Not a “weeknight” that somehow takes 90 minutes.
What You’ll Need
| Ingredient | Amount |
|---|---|
| Boneless, skinless chicken breasts | 1.5 lbs, cut into small pieces |
| Garlic, minced | 6 cloves |
| Unsalted butter | 4 tablespoons |
| Olive oil | 1 tablespoon |
| Italian seasoning | 1 teaspoon |
| Paprika | 1/2 teaspoon |
| Salt | 3/4 teaspoon |
| Black pepper | 1/2 teaspoon |
| Shredded mozzarella cheese | 2 cups |
| Shredded cheddar cheese | 1 cup |
| Cream cheese, softened | 4 oz |
| Large flour tortillas | 4-6 |
| Fresh parsley, chopped | For garnish |
Side Note: The cream cheese is optional but it’s what makes the filling extra gooey instead of just melty. If you skip it, you’ll still get a great wrap, just a slightly less decadent one.
Tools You’ll Need
- Large skillet
- Small saucepan (for the garlic butter)
- Cutting board and sharp knife
- Mixing bowl
- Pastry brush (or just use a spoon, honestly)
- Spatula
How to Make Cheesy Garlic Chicken Wraps
- Make the garlic butter. Melt the butter in a small saucepan over low heat. Add the minced garlic and cook for 1-2 minutes, just until fragrant. Don’t let it brown, or it’ll turn bitter. Set half of it aside for later.
- Season the chicken. In a bowl, toss the chicken pieces with olive oil, Italian seasoning, paprika, salt, and pepper.
- Cook the chicken. Heat a large skillet over medium-high heat. Add the chicken and half of the garlic butter. Cook for 6-8 minutes, stirring occasionally, until the chicken is cooked through and starting to get golden on the edges.
- Add the cream cheese. Lower the heat and stir in the cream cheese until it melts and coats the chicken. This is the step that makes people ask what your secret is.
- Assemble the wraps. Lay out your tortillas. Down the center of each one, add a layer of mozzarella and cheddar, then a scoop of the chicken mixture, then more cheese on top.
- Fold and seal. Fold in the sides of the tortilla, then roll it up tightly like a burrito.
- Crisp it up. Wipe out your skillet and set it back over medium heat. Brush the outside of each wrap with the remaining garlic butter and place seam-side down in the skillet.
- Cook until golden. Cook for 2-3 minutes per side, pressing down gently with your spatula, until both sides are crispy and golden brown.
- Rest, slice, serve. Let the wraps sit for 1-2 minutes before slicing in half. That cheese needs a second to stop being lava.
- Garnish and dig in. Sprinkle with fresh parsley and serve while the cheese is still stretchy.
Pro Tips
- Don’t skip the resting step. I know it’s tempting to slice into it right away, but molten cheese needs a minute to firm up slightly or it’ll just run everywhere.
- Shred your own cheese if you can. Pre-shredded cheese has anti-caking agents that keep it from melting as smoothly. It’s a small thing, but you’ll notice the difference in stretch.
- Warm your tortillas first. A few seconds in a dry pan or the microwave makes them way more pliable, so you’re not fighting to fold them without tearing.
- Don’t overfill. I learned this one the hard way. Overstuffed wraps split open in the pan and you end up with cheese burning onto your skillet instead of staying inside the wrap.
- Medium heat, not high. High heat browns the outside before the inside filling is even warm again. Medium gets you that golden crust without a cold center.
Substitutions and Variations
- Chicken thighs instead of breasts. They’re more forgiving if you overcook them slightly, and they bring a little more flavor.
- Rotisserie chicken shortcut. Shred up a store-bought rotisserie chicken and toss it with the garlic butter and seasonings instead of cooking raw chicken. Cuts your prep time way down.
- Spice it up. Add a pinch of red pepper flakes to the garlic butter, or mix a little hot sauce into the chicken.
- Swap the cheese. Pepper jack, provolone, or a smoked gouda would all work well here if mozzarella and cheddar aren’t your thing.
- Low-carb version. Use low-carb tortillas, or skip the wrap entirely and serve the cheesy chicken over cauliflower rice.
- Add veggies. Sautéed spinach, mushrooms, or roasted red peppers all fold in nicely with the chicken.
Make Ahead Tips
You can make the chicken filling up to 3 days ahead and store it in the fridge.
When you’re ready to eat, just reheat the filling, assemble the wraps, and crisp them up in the pan. That’s really the only step you want to do fresh, since a wrap that sits around after crisping tends to go soft.
You can also assemble the wraps ahead of time (without cooking them) and freeze them individually wrapped in foil for up to a month. Cook straight from frozen, just add a few extra minutes per side.
Nutrition (Per Wrap, Estimated)
| Nutrient | Amount |
|---|---|
| Calories | ~480 |
| Protein | 32g |
| Carbohydrates | 28g |
| Fat | 26g |
| Fiber | 2g |
| Sodium | 690mg |
These numbers are estimates based on standard ingredients and will shift depending on your exact brands, tortilla size, and cheese amounts. If you’re tracking closely, plug your specific ingredients into a nutrition calculator.
For lower calorie: Use reduced-fat cheese and light cream cheese, and go easy on the butter for crisping.
For higher protein: Add an extra half pound of chicken or mix in some cottage cheese with the cream cheese (sounds weird, works great).
What to Serve With These Wraps
- A simple green salad with a lemony vinaigrette to cut through the richness
- Tomato soup for dipping, because cheesy bread and tomato soup is basically a law of nature
- Roasted vegetables like broccoli or asparagus
- A cold glass of lemonade or iced tea
Leftovers and Storage
Store leftover wraps in an airtight container in the fridge for up to 3 days.
They reheat best in a skillet over medium-low heat, which brings back some of that crispy exterior. The microwave works in a pinch, but the tortilla will turn a little soft.
To freeze, wrap each cooled wrap tightly in foil, then place in a freezer bag for up to 2 months. Thaw overnight in the fridge before reheating.
FAQ
Can I use a different type of wrap?
Yes. Flour tortillas give you the most pliable fold, but a burrito-size whole wheat tortilla or even a low-carb wrap will work fine.
Why did my wrap fall apart while cooking?
This usually means it wasn’t rolled tightly enough, or it was overfilled. Roll it snug, and place it seam-side down first so the heat helps seal it shut.
Can I bake these instead of pan-frying?
You can. Brush with garlic butter, place seam-side down on a baking sheet, and bake at 425°F for about 12-15 minutes, flipping halfway.
Is there a way to make this dairy-free?
Swap in your favorite dairy-free shredded cheese and cream cheese alternative, and use a dairy-free butter for the garlic butter. It won’t be quite as stretchy, but it’ll still be good.
Can kids help make this?
Assembling the wraps is a great kid task. The stovetop steps (melting butter, cooking chicken, crisping the wraps) are best left to adults.
Wrapping Up
This is one of those recipes I keep coming back to when I want something that feels like a treat but doesn’t actually take much effort.
Give it a try, and let me know in the comments how yours turned out. Did you add anything different? Any questions before you get started? Drop them below, I read every one.